
ChatPion’s messenger bot can send sequence messages to people, different messages to different types of people. That is, it can send messages to them one after another— specific messages to specific types of people.
ChatPion’s messenger bot can send two types of sequence messages-- promotional and non-promotional. As for the promotional messages, you have to select the 24-hour option. Contrarily, as for the non-promotional messages, you have to select the non-promotional daily option.
With ChatPion, you can create a campaign for sequence messages in two ways— via classic bot builder and flow builder. Actually, creating a campaign for sequence messages via ChatPion’s Flow Builder is much easier. In one word, creating a campaign for sequence messages on ChatPion’s Flow Builder is remarkably easy and extremely straightforward.
In this article, I will show you how to create sequence messages on ChatPion’s Flow Builder.
Let’s dive into how to create a campaign for sequence messages on ChatPion Flow Builder.
At the left panel of the ChatPion dashboard, you will see the visual Flow Builder option.
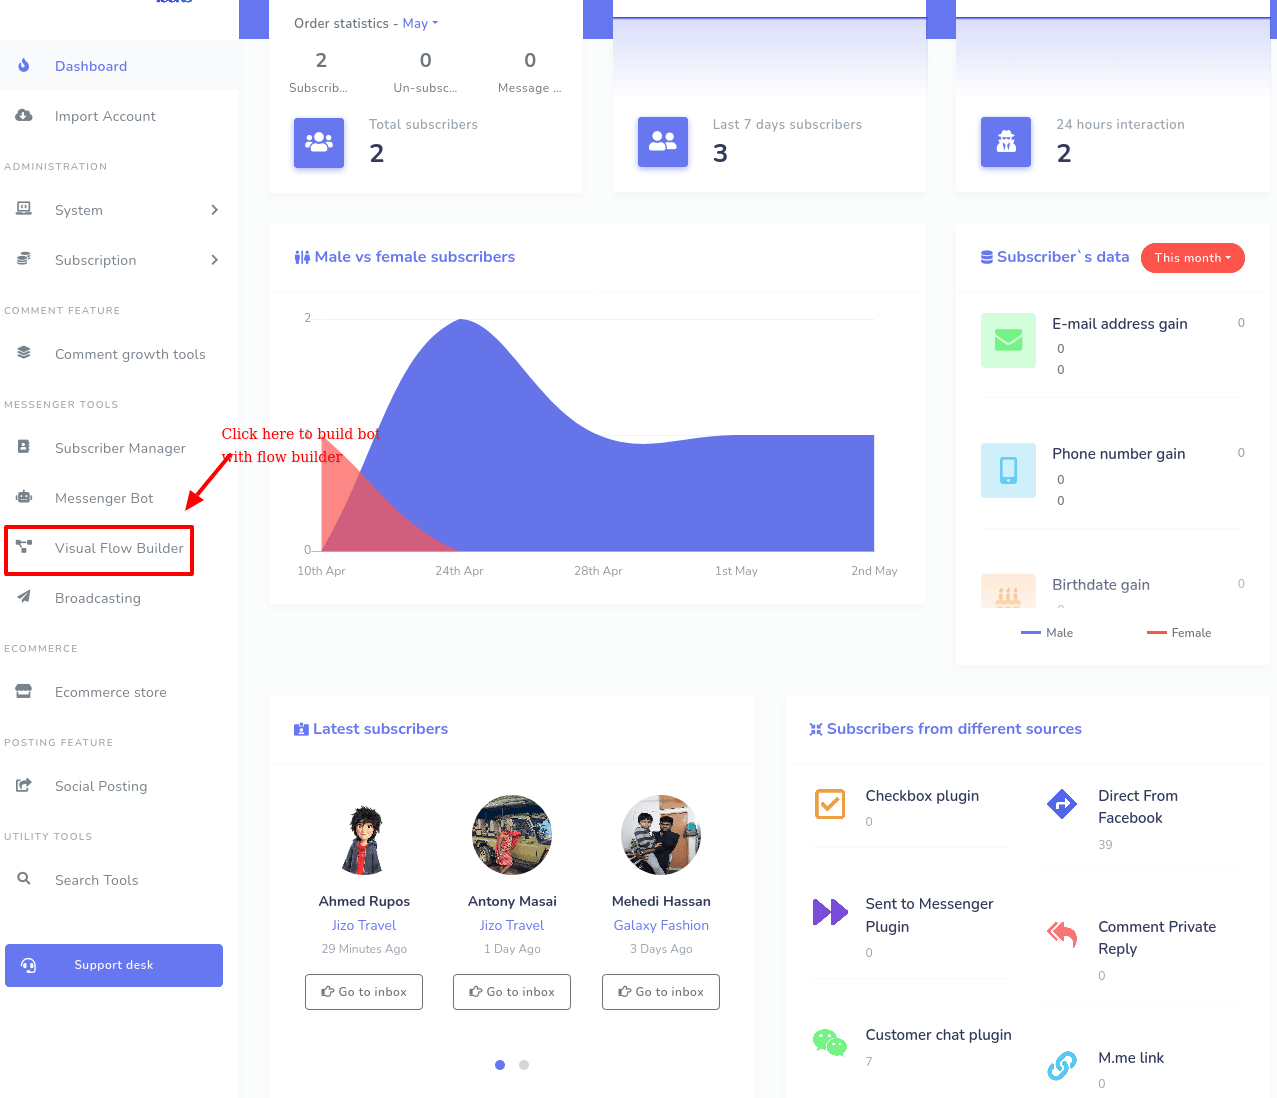
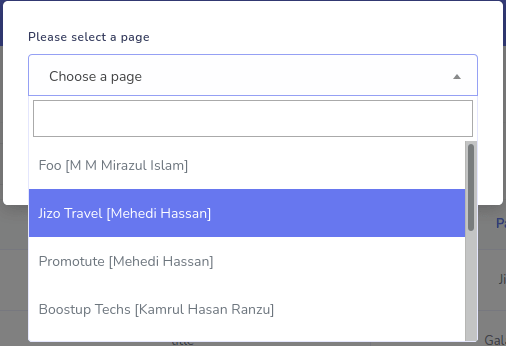
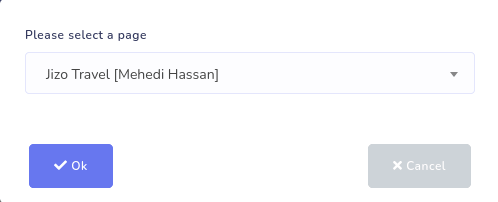
Click on the visual Flow builder > Create new flow > Select a Facebook Page from a drop-down menu and click the ok button. Instantly, the flow builder will appear.

The flow builder is divided into two sections— the dock menu and the editor where you will build your bot. On the dock menu, you will see all the elements or components are gathered together except one. On the other hand, on the editor, an element called Start Bot Flow is already on the editor, the Start Bot Flow that is, in fact, a reference.
Well, Now from the Dock-menu, drag the trigger element and drop it on the editor before the start bot Flow element. In the trigger elements, you have to add keywords.
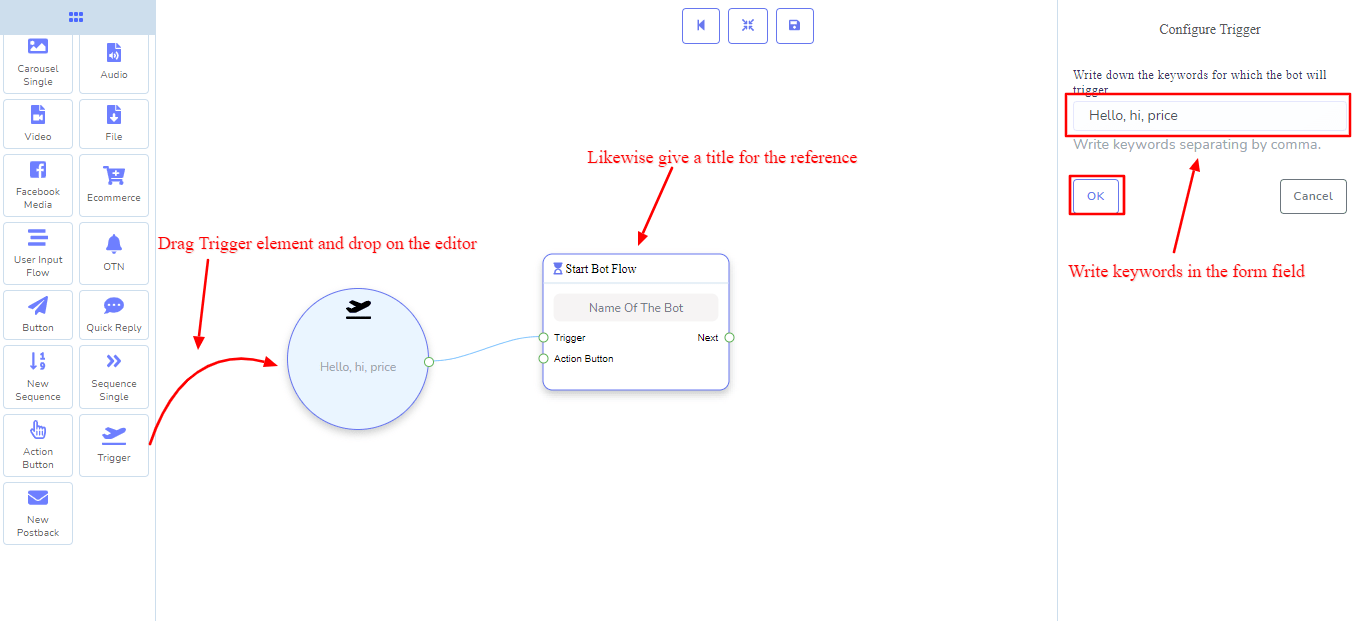
Double click on the trigger element > add your keywords in the Form field appeared at the right side of the editor > click okay.
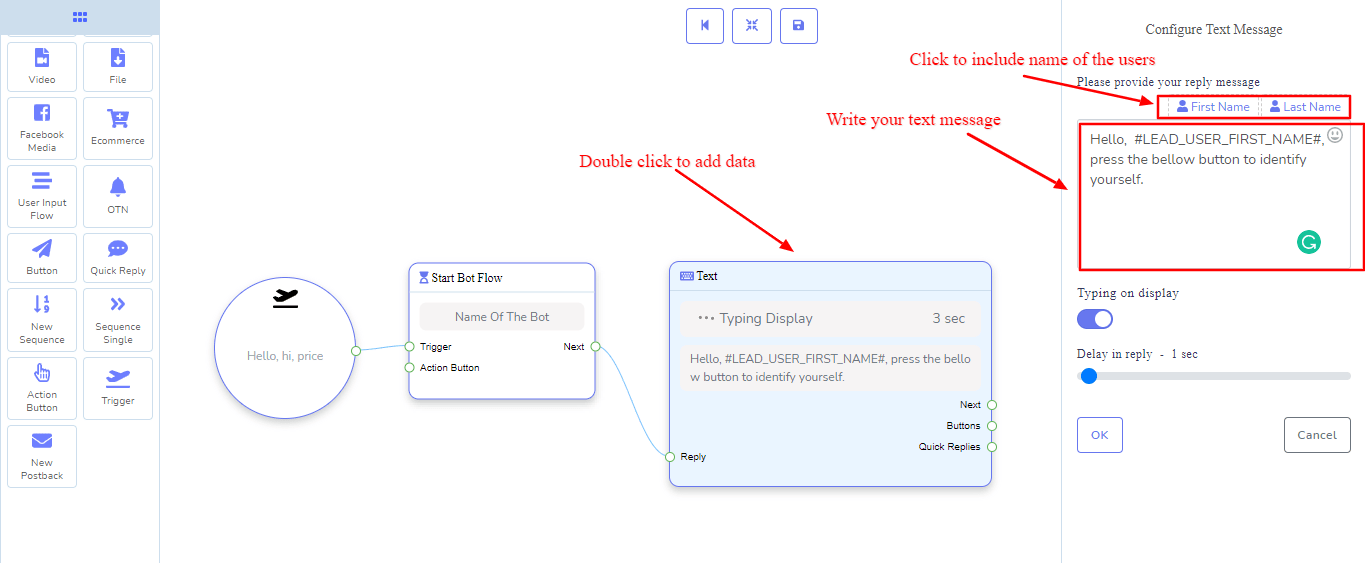
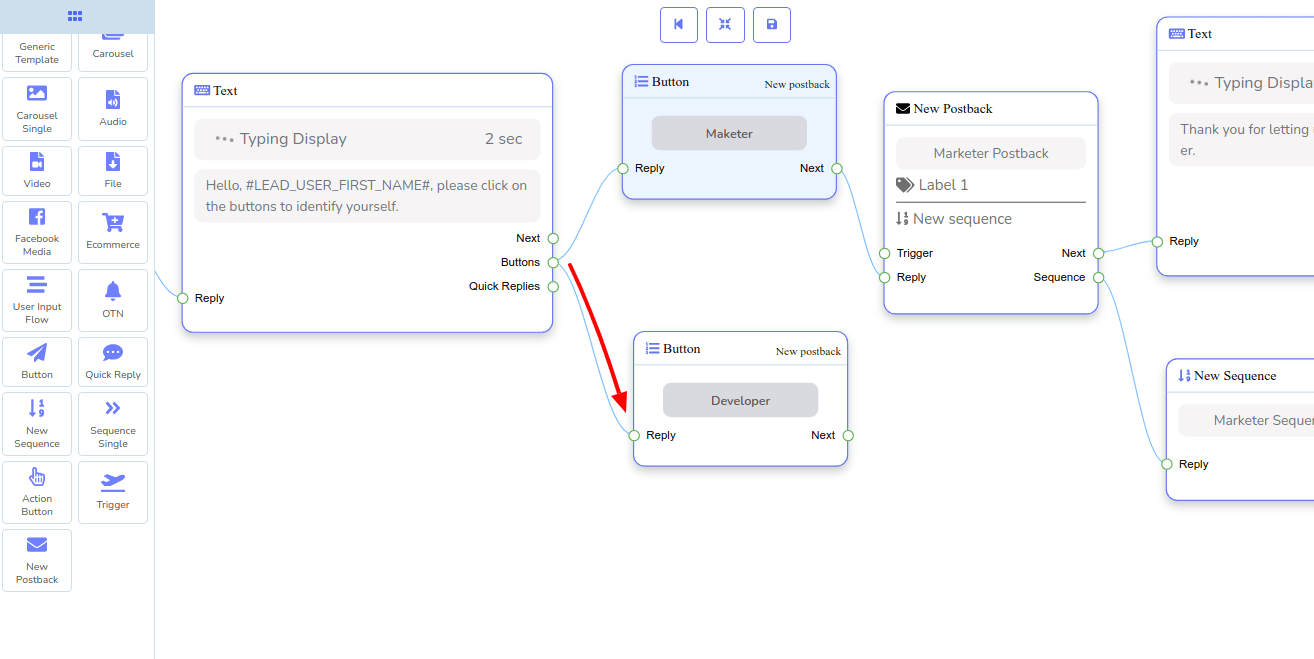
Now connect the trigger element with the reference called the start bot flow element. Next, drag and drop the text element and connect it to start bot flow. Double click on the text element> insert your text message in the form field that appeared at the right side of the editor. You can include the first name or last name of the user in the text message.
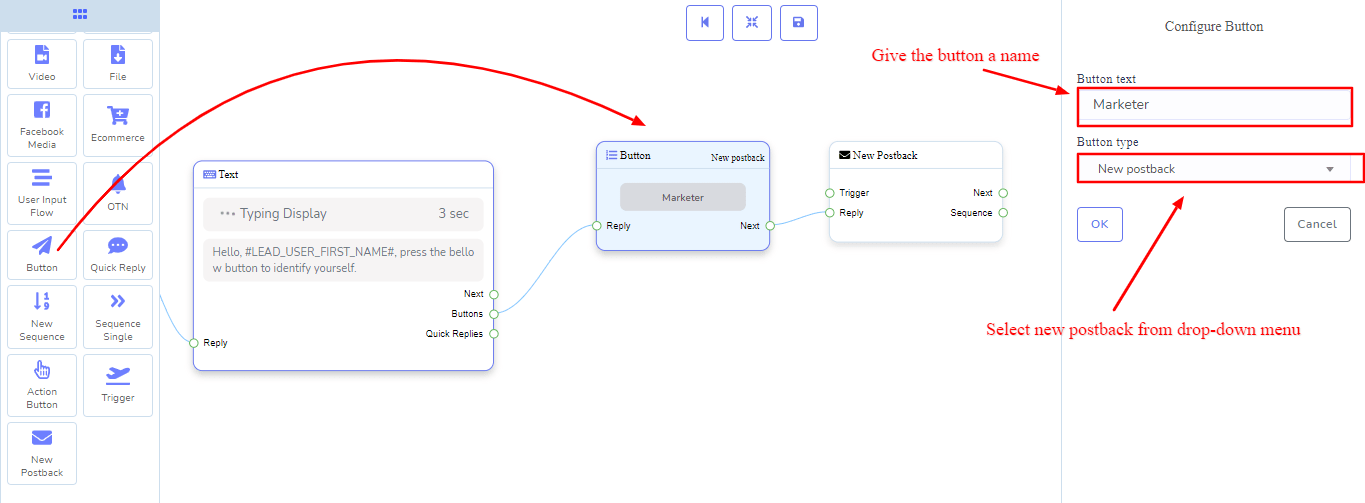
Now drag and drop a button element after the text element and connect the button with it. Give the buttons names and select button type from a drop-down menu. In this case, select a new postback. Just as you click on the ok button, new postback elements will appear on the editor, the new postback that is connected to the button. In the New postback element, you will see the sequence socket.
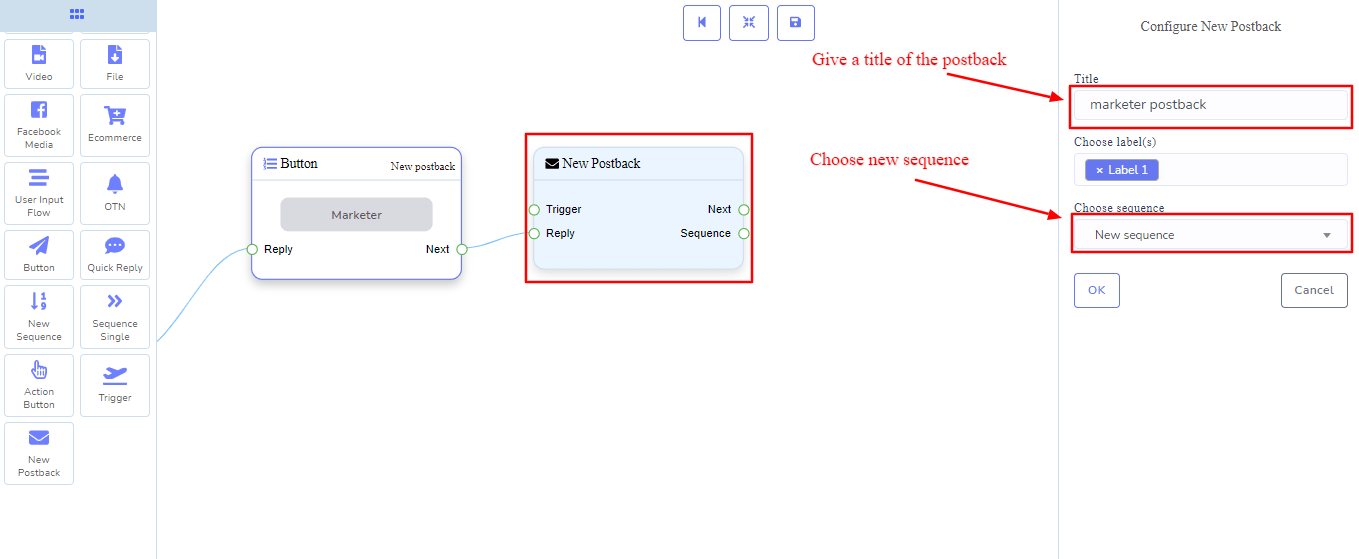
Well, now double click on the New post back > give a title > you can choose labels > if you have a ready-made sequence, you can select it from choose sequence. Otherwise, select a new sequence. Now click on the ok button. Here, I select a new sequence.
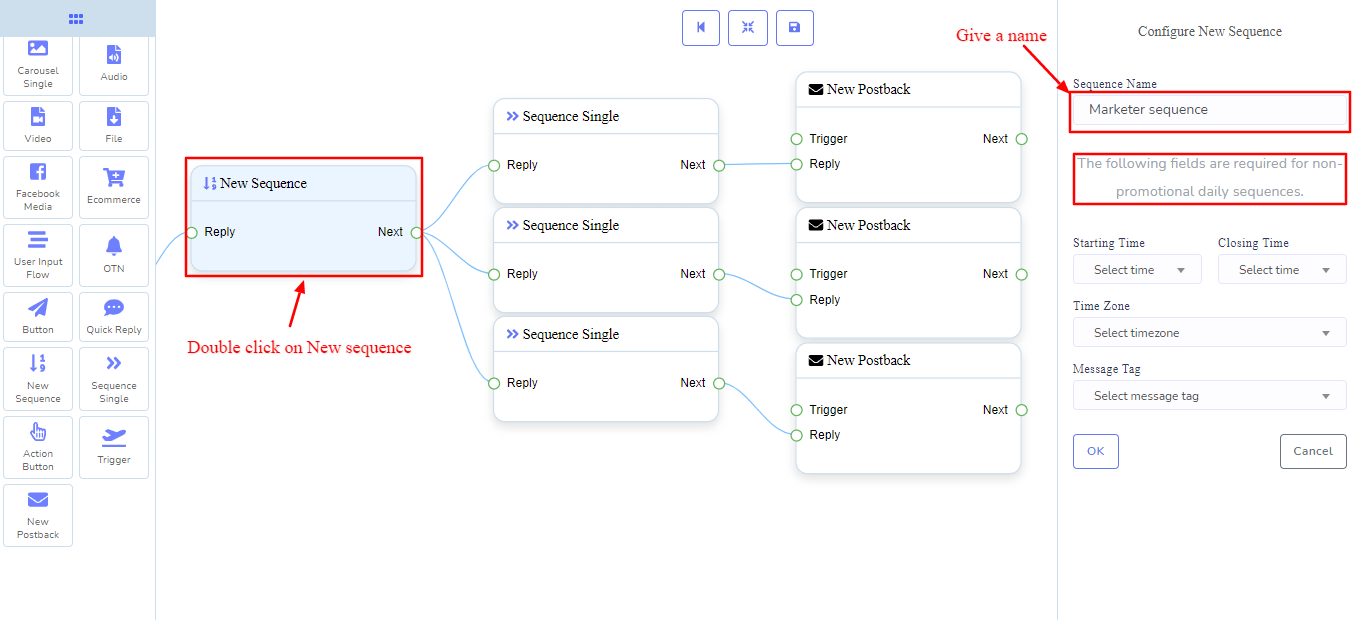
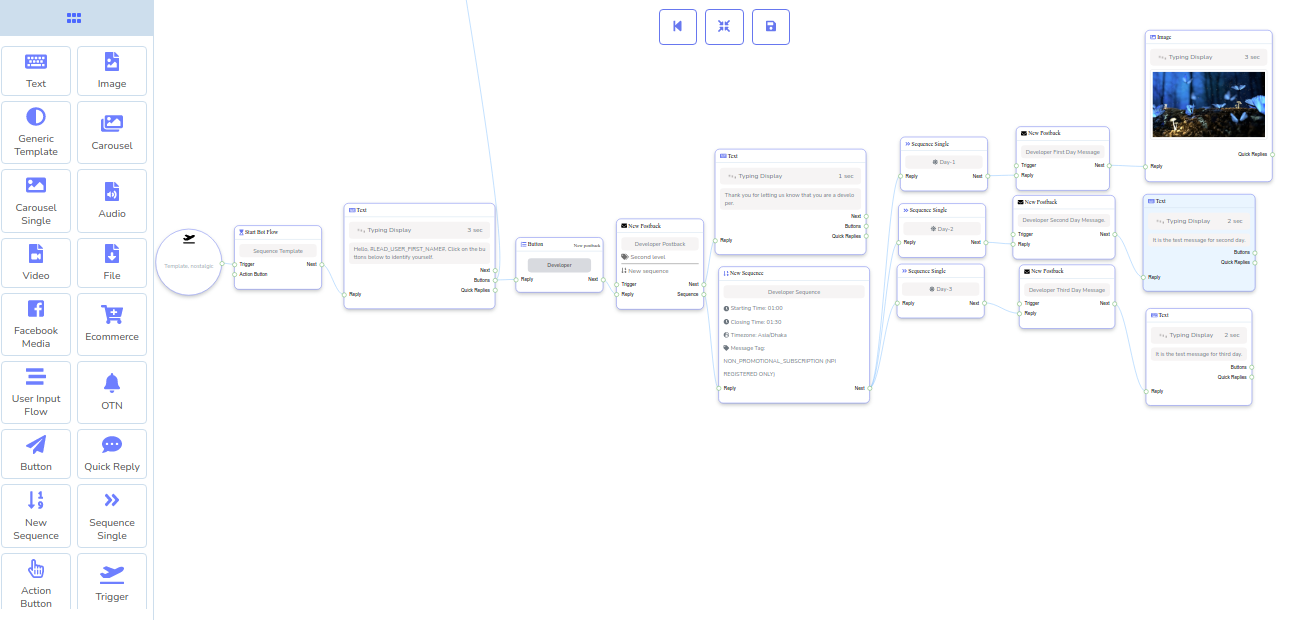
Instantly, a new sequence element will appear with three sequence single elements connected with each new sequence and three new postbacks connected with each sequence single. Well, you can add another single sequence with the new sequence. The single sequence will come with another new postback connected with the single sequence.
Now create a sequence by adding data to the single sequence and new postback.
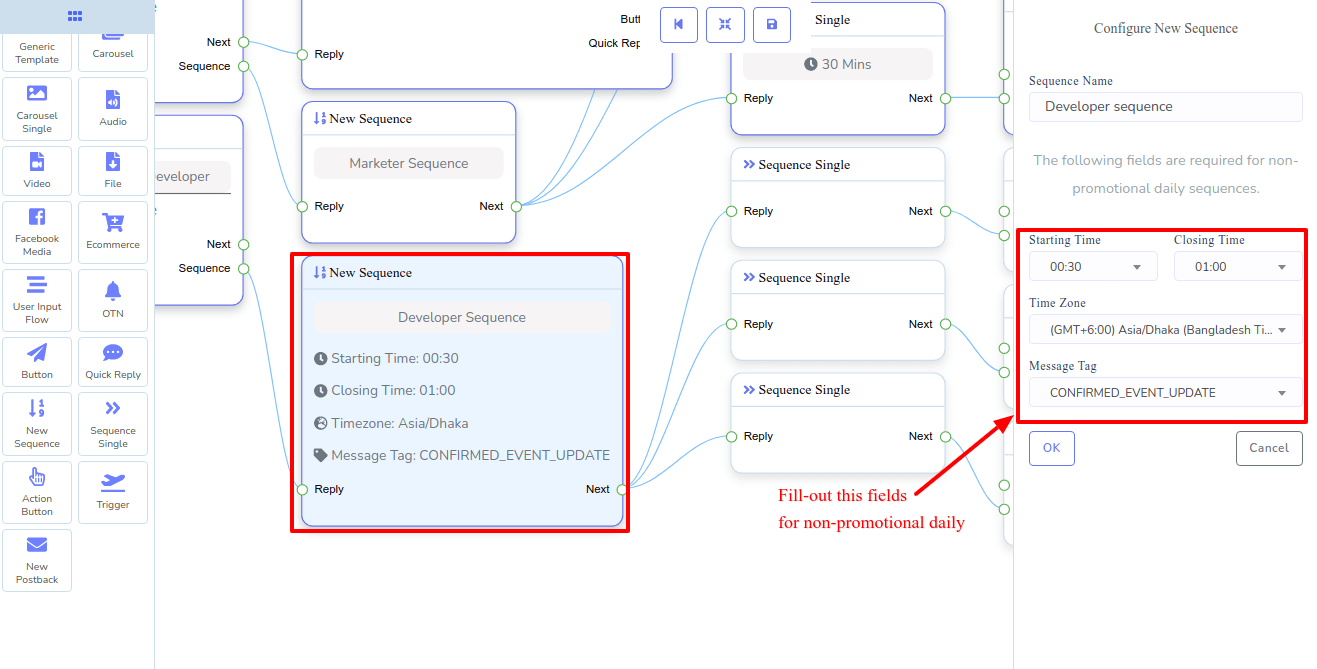
Double click on the new sequence > gives a title for the sequence. Under the Sequence name field, you will see some time-related fields and message tag fields. If the sequence is daily non-promotional, the fields are required. If you want to create a campaign for promotional 24 hours sequence messages, you don’t need to fill out these fields. Here I am creating a campaign for promotional 24 hours sequence messages, so I don’t fill out these fields. Now click on the okay button.
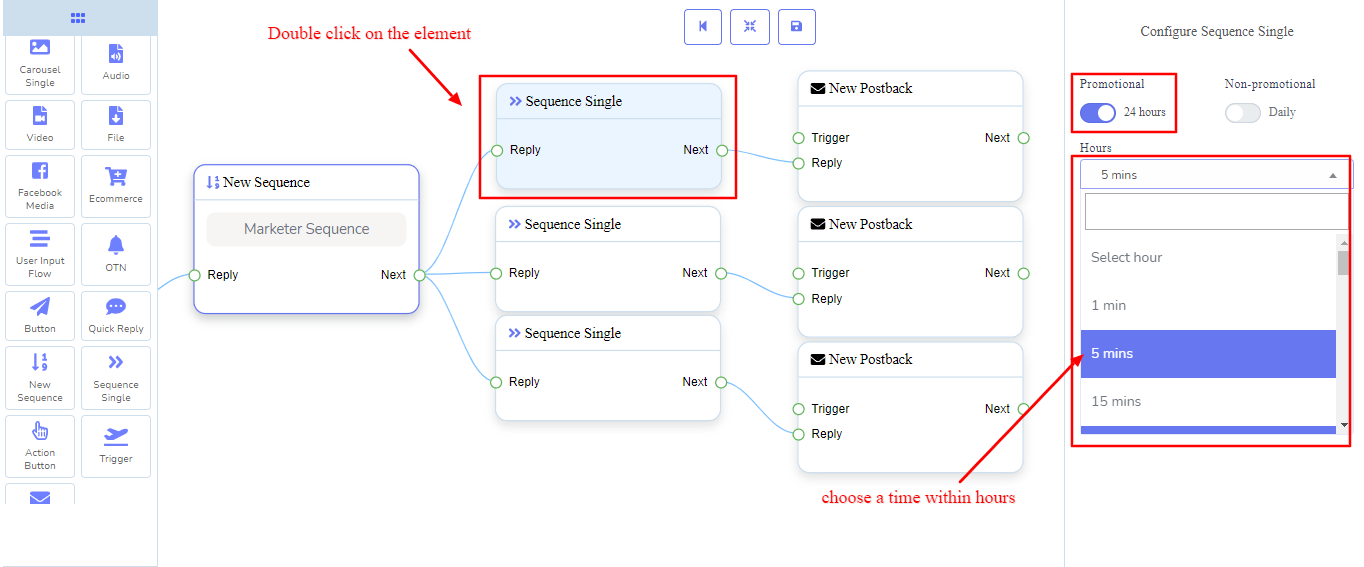
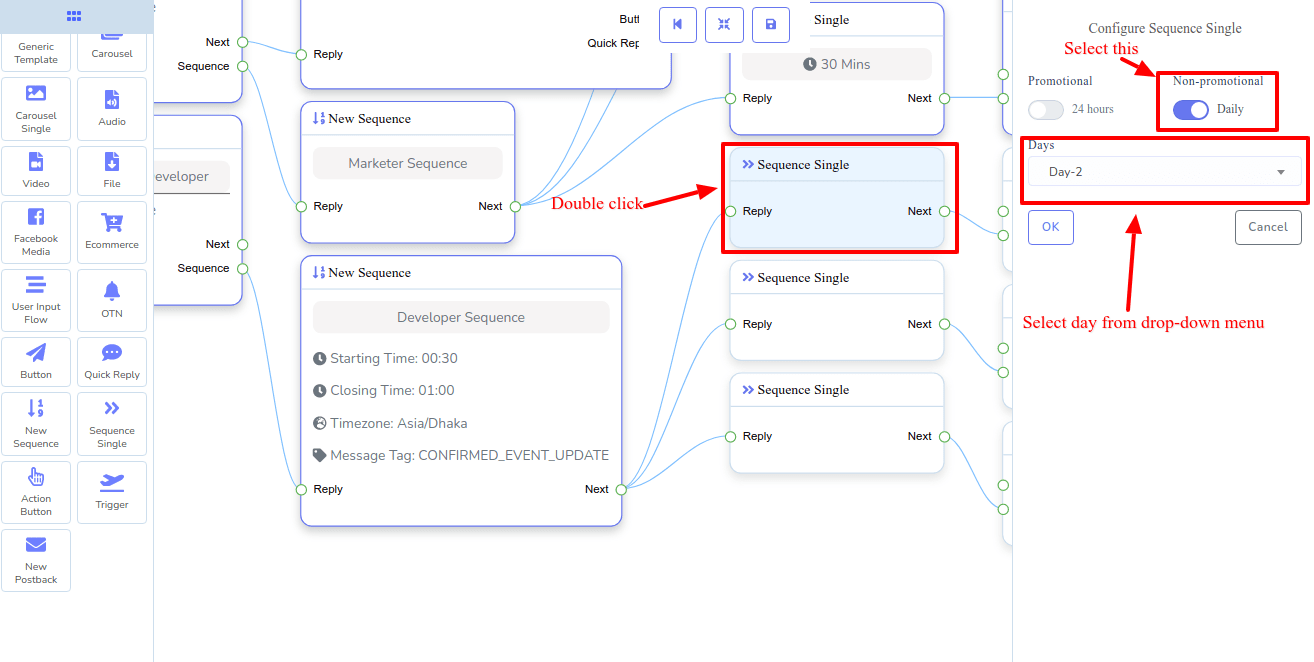
After that, click on the single sequence element and two radio buttons-- promotional 24 hours and non-promotional daily will appear. Here I select promotional 24 hours. Then you will see a form field called hours. Click on the form field and a drop-down menu of different time limits in hours will appear. Now select a time and click the okay button. Likewise, add data to the other single sequence elements.
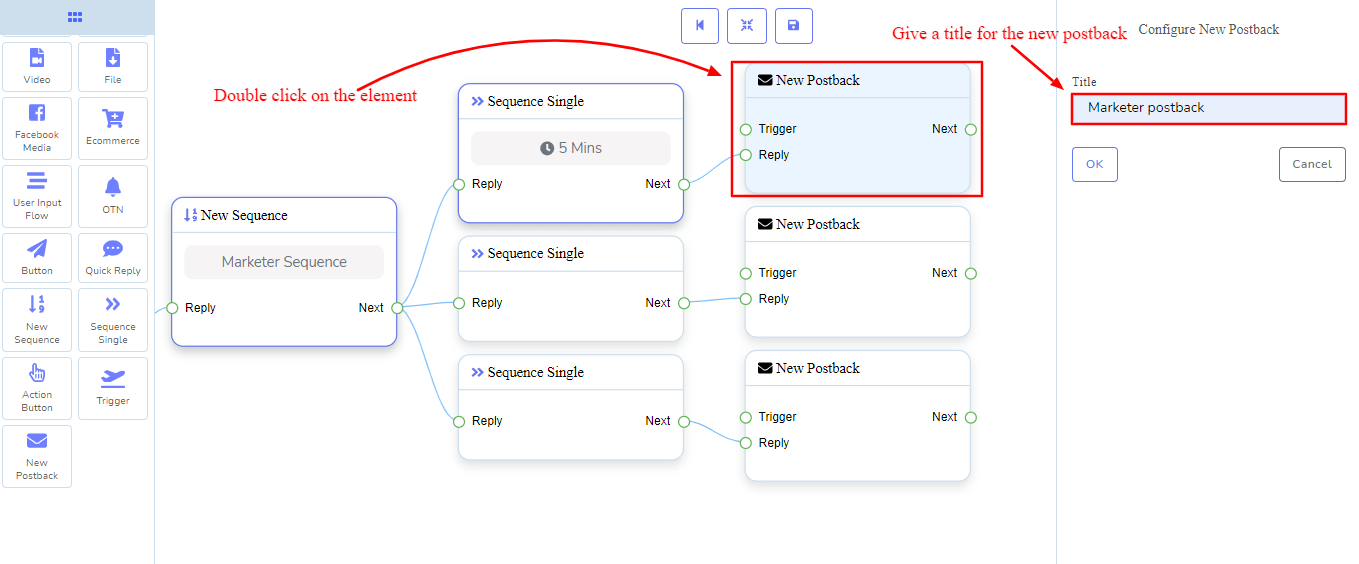
Thereupon, you have to give titles to the postback elements connected to each single sequence element. After you have finished giving the title of each new postback, you have to connect another element to provide the message.
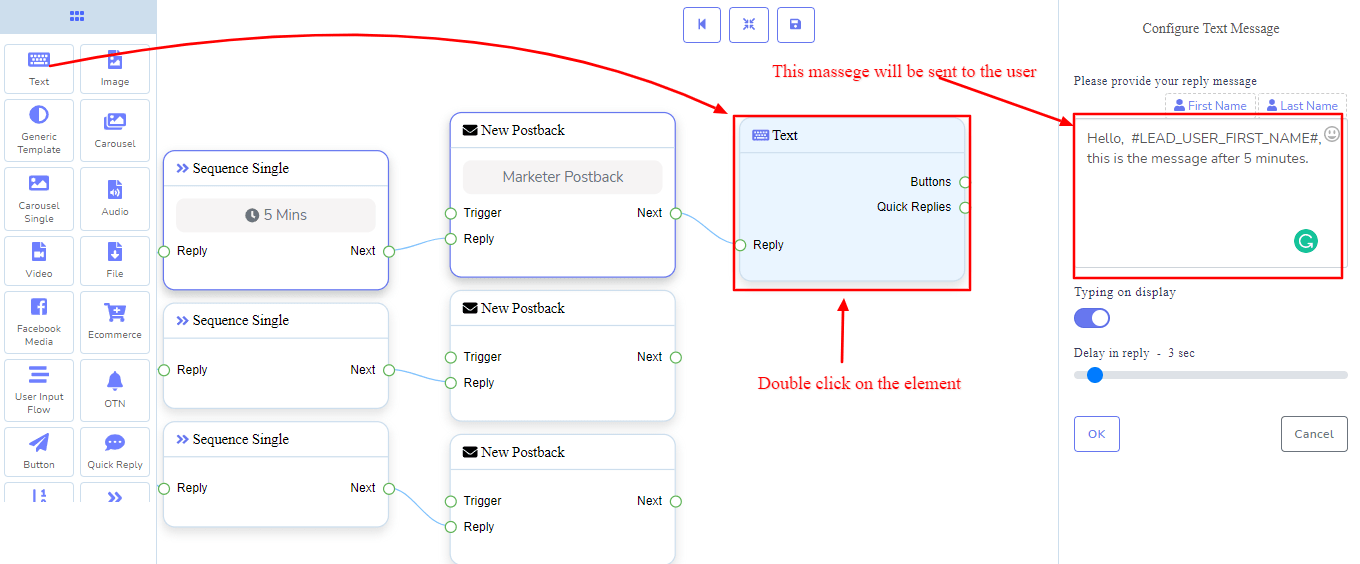
Now drag and drop the text element after the new postback and connect it with the new postback. Then double click on the text element> write text to the form field like before.
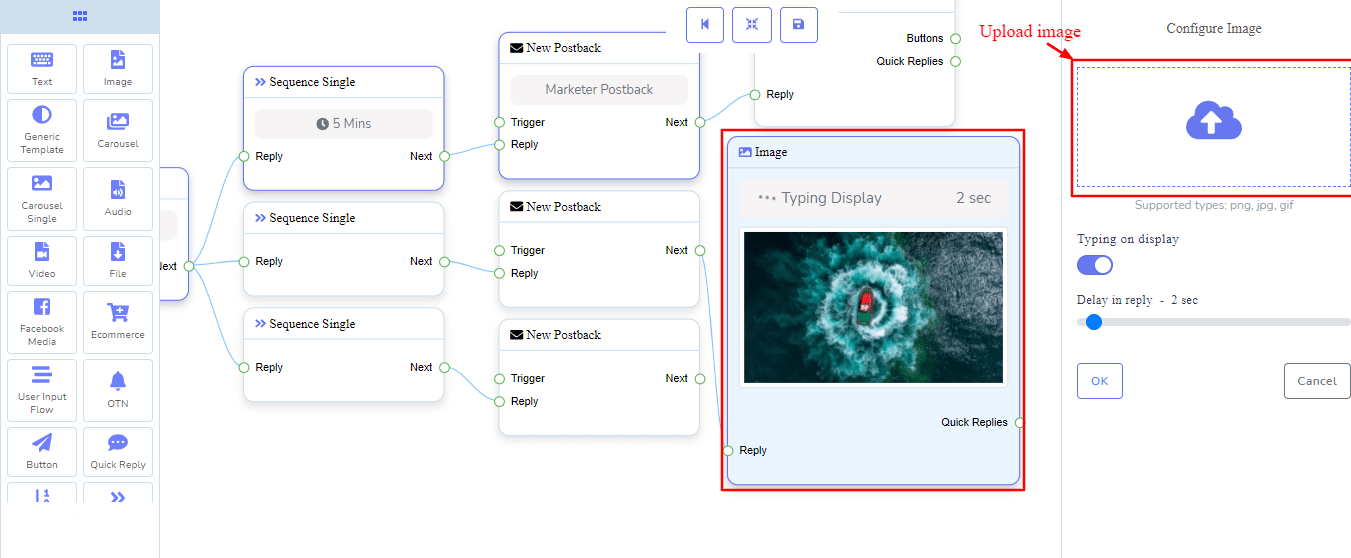
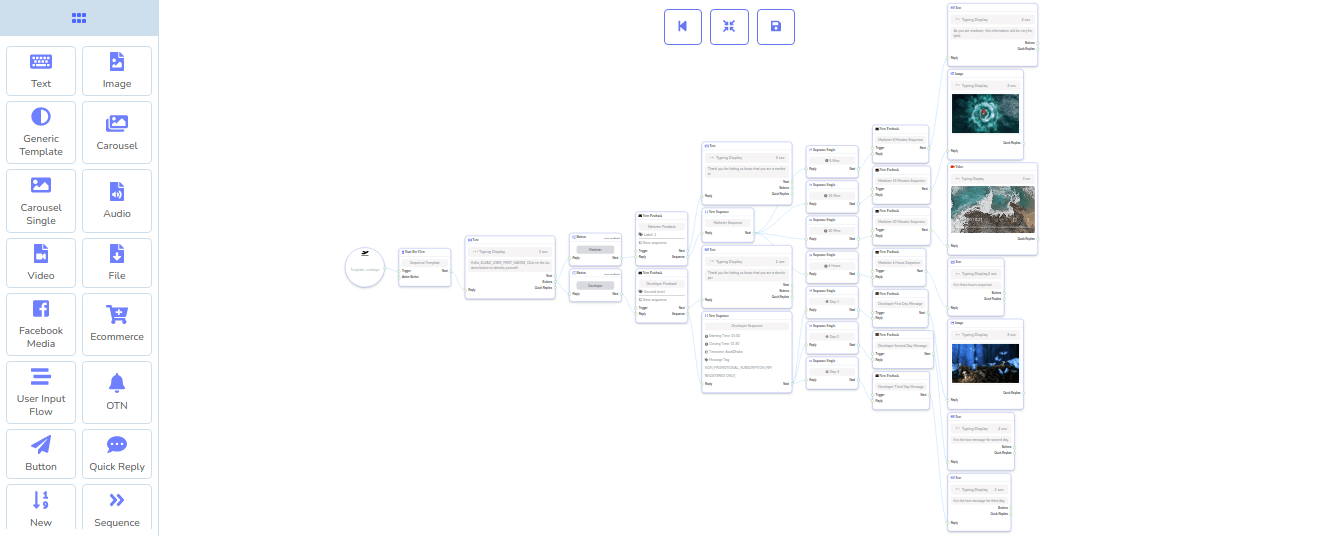
Besides text elements, you can of course connect elements like image, audio, file video, and so on to the new postback element and add data accordingly.
After the time I have specified in the sequence single element, the message in the text element will be delivered to the subscribers.
Now click on the rearrange to rearrange your bot and save button to save it. Whoa! You get dialog box with warning: New postback must have connections.
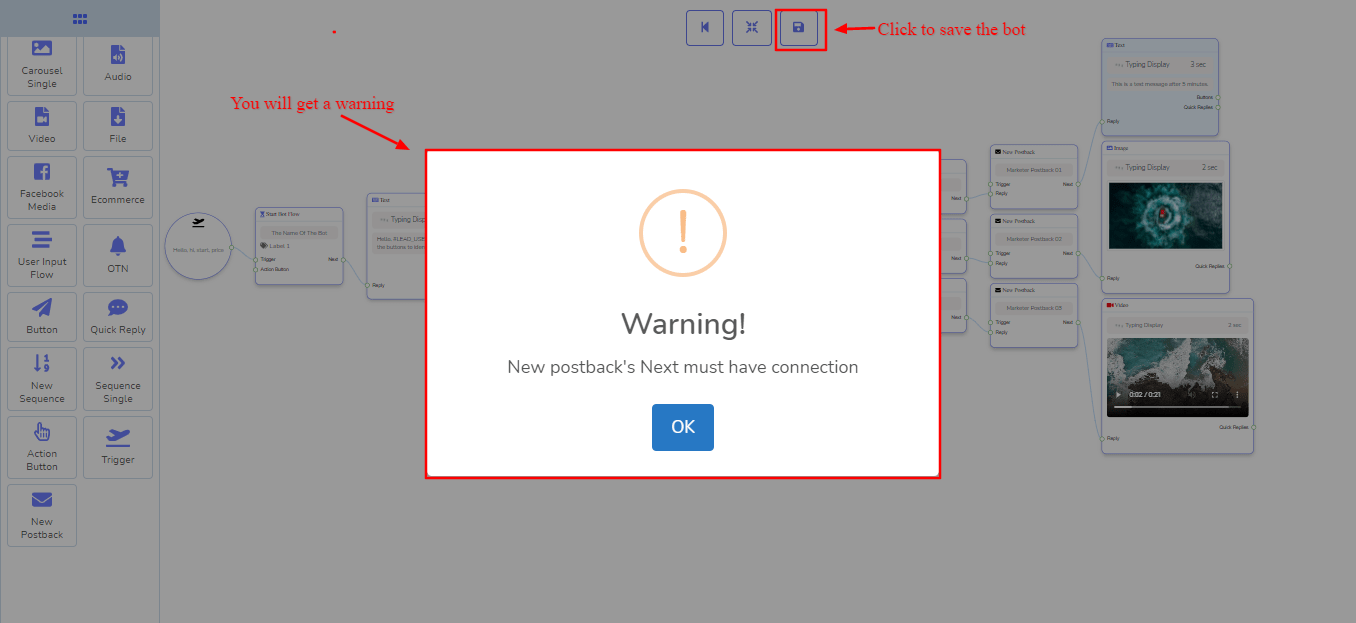
Click on the okay and you will see that New postback element connected to the button is marked red.
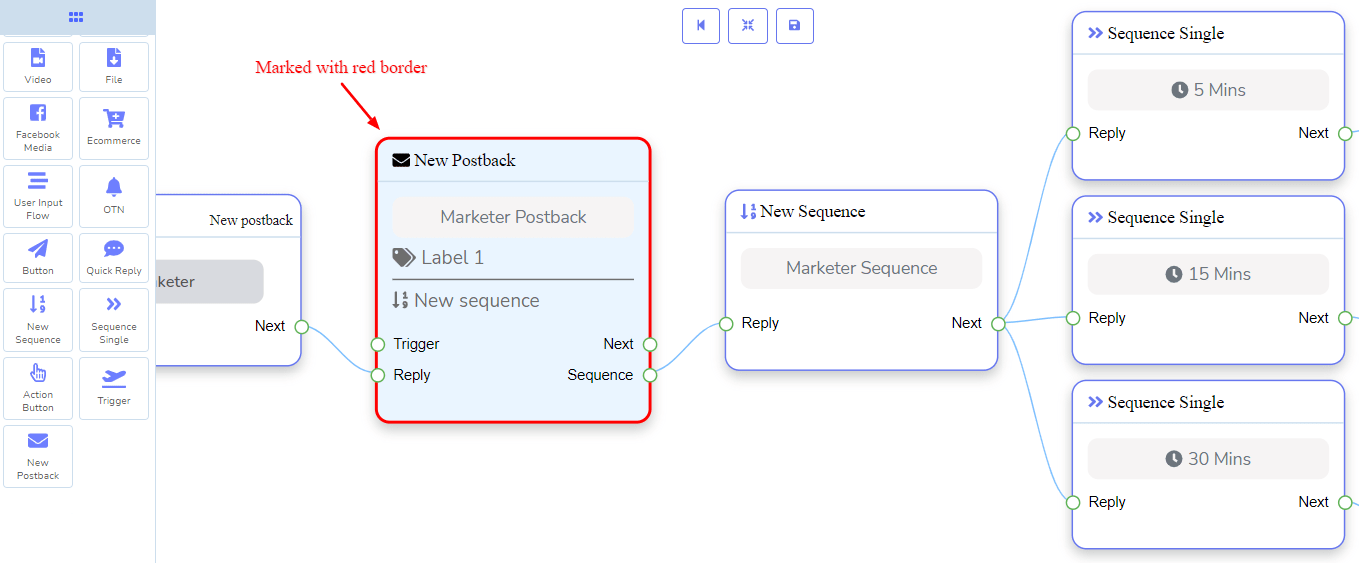
That is, besides the new sequence, you have to connect another element, such as the text element to the new postback.
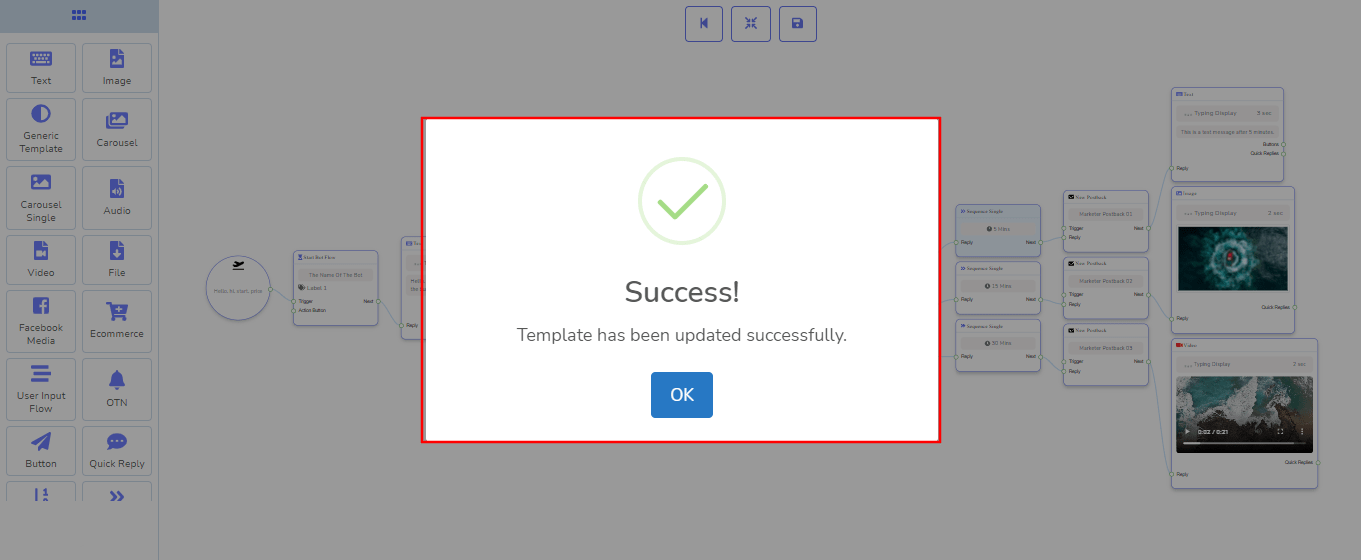
Now drag a text element and drop after the new postback element > connect it with the new postback element > add text to the text element.

Now click on the save button and your bot will be saved. A dialog box will show you that Your template has been updated succesfully.
When a user clicks on the button you provided, the text will be sent to the user. Then, after the time you specified, the last messages will be sent to the users. If you specified three single sequences, three messages will be sent one after another at the time you specified in the single sequence.
Of course, you can create as many sequences as you want. To add another sequence, you have to connect another button to the text element.
After connecting the button, you have to follow the same instructions described above. Unlike before, you can send non-promotional daily sequence messages.
In this case, when you configure a new sequence, fill out time-related fields and message tag fields > turn on the non-promotional daily button > select a day from a drop-down list in the day’s field > give a title to the new postback element > connect any element among text, image, audio, file, video and so on and add data or upload media accordingly.
Ultimatelly the part of the non-promotional daily sequence message will look like this.
Now just click rearrange button and save button like before and you will see a success message.

Now your bot will be able to send sequence messages to the users.
Thanks a lot for reading the article. I hope you will enjoy sending sequence messaging with ChatPion’s Flow Builder.
Still, if you have any confusion on How To Send Sequence Messaging With ChatPion’s Flow Builder, watch the video tutorial below and follow the instructions step by step.


1 Comments Login to comment
-

I cannot see the FLow builder in my dashboard menu. It is installed correctly. I am running the latest version of the softwares.
1
5886
Social Media Management