To create a User Input Flow Campaign, First, go to the main Dashboard of the ChatPion. Now, click on the Visual Flow Builder option at the left sidebar of the Dashboard.
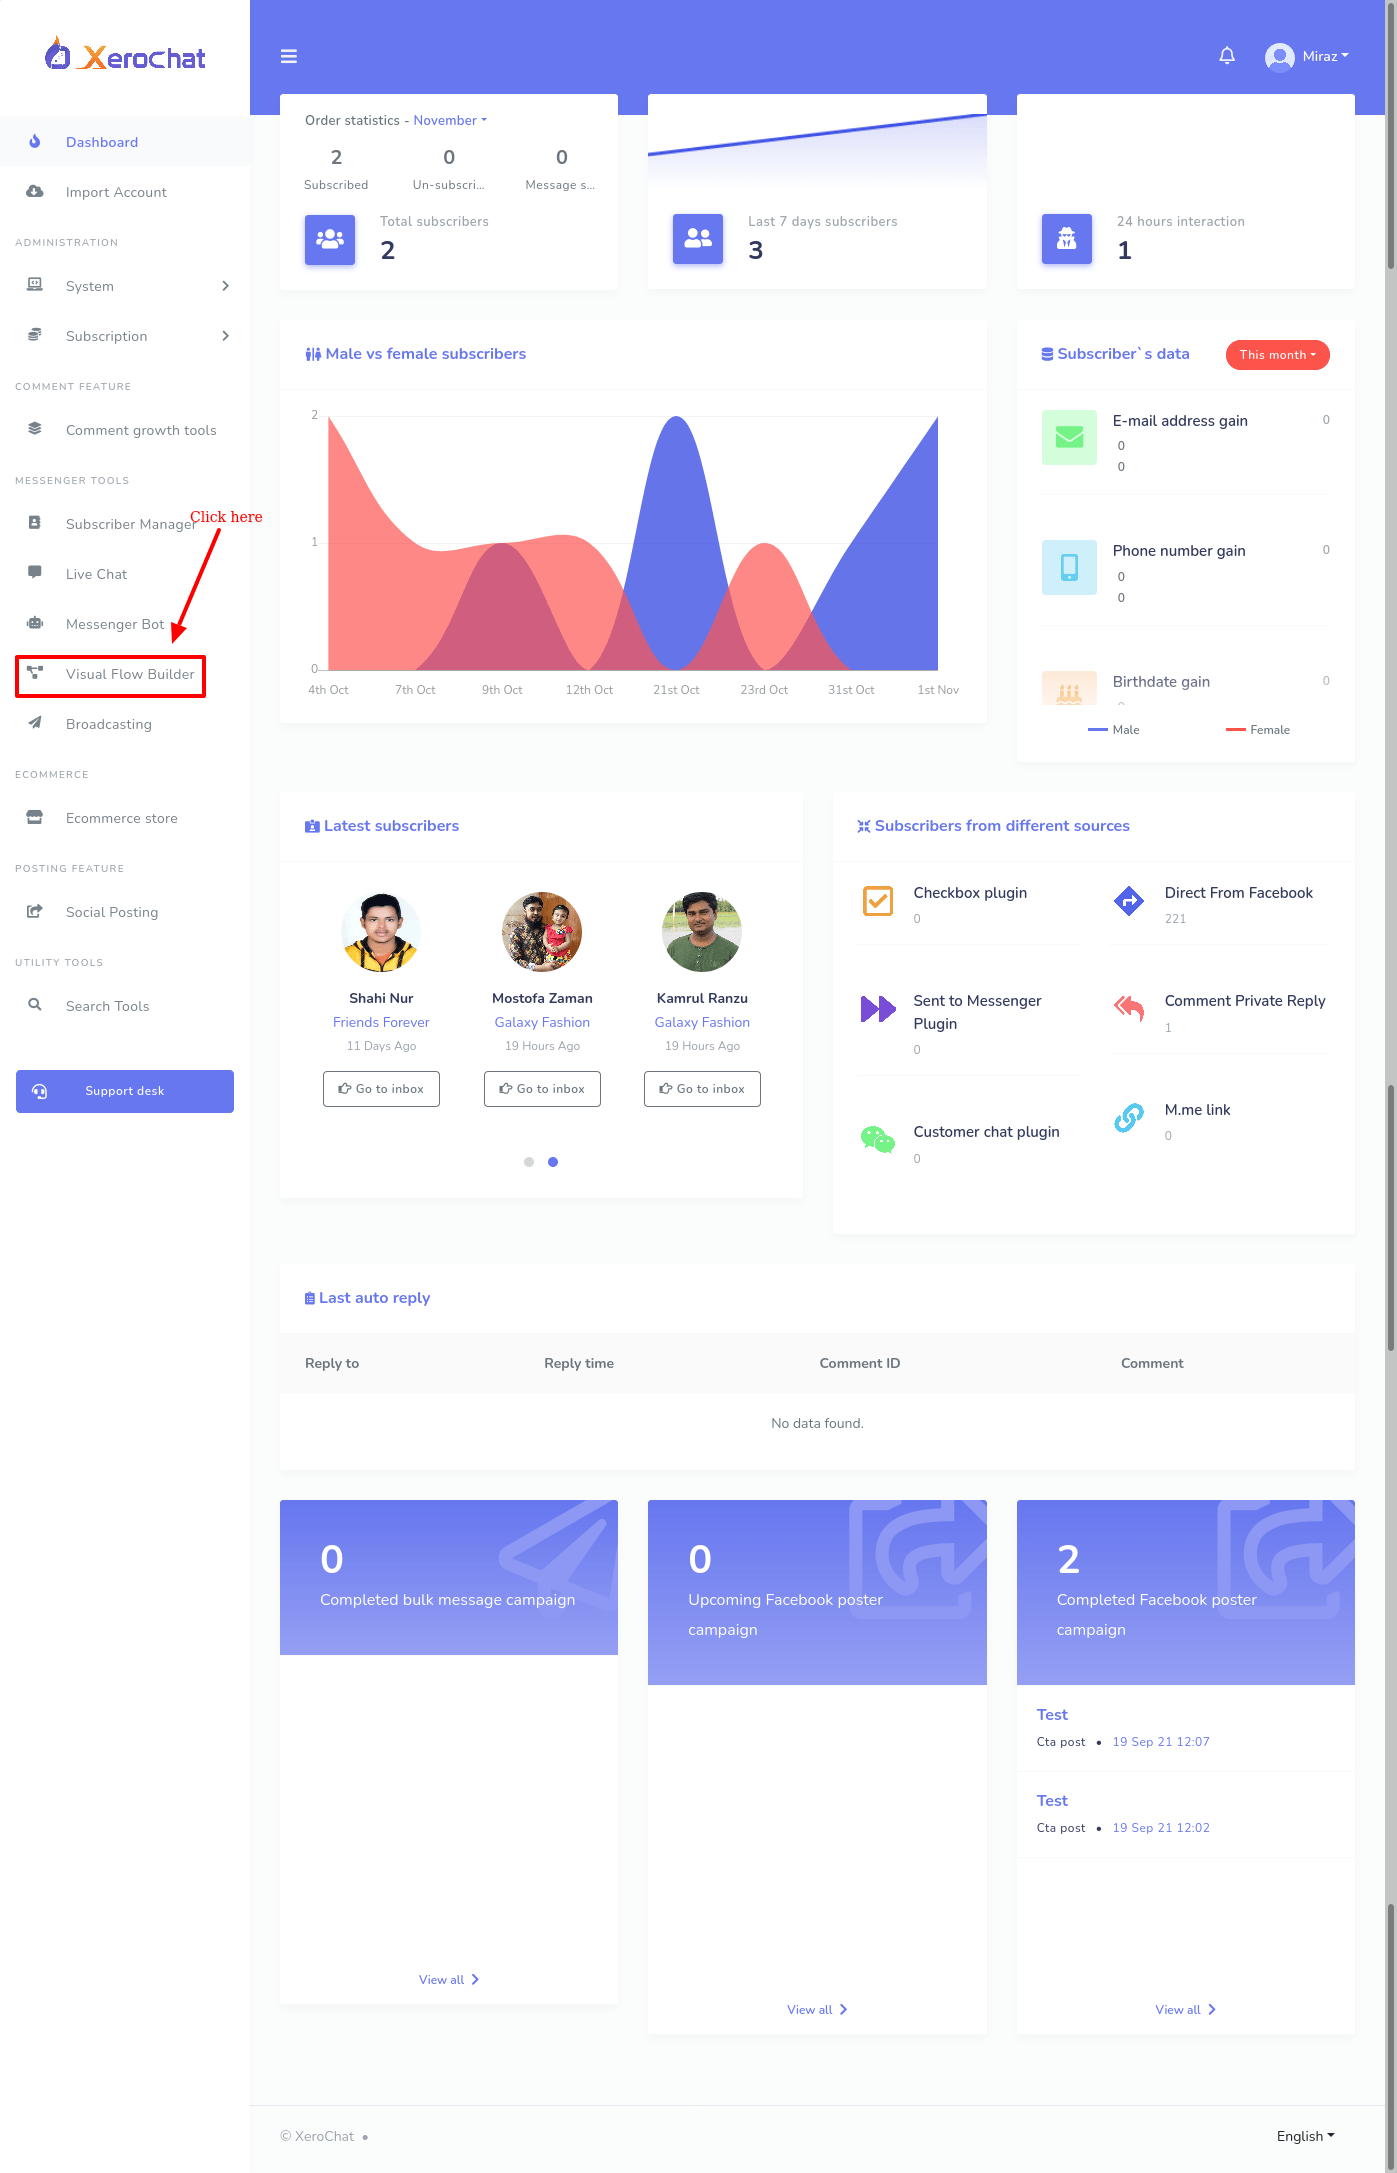
Instantly, the visual Flow Builder page will appear with a button called Create new flow.
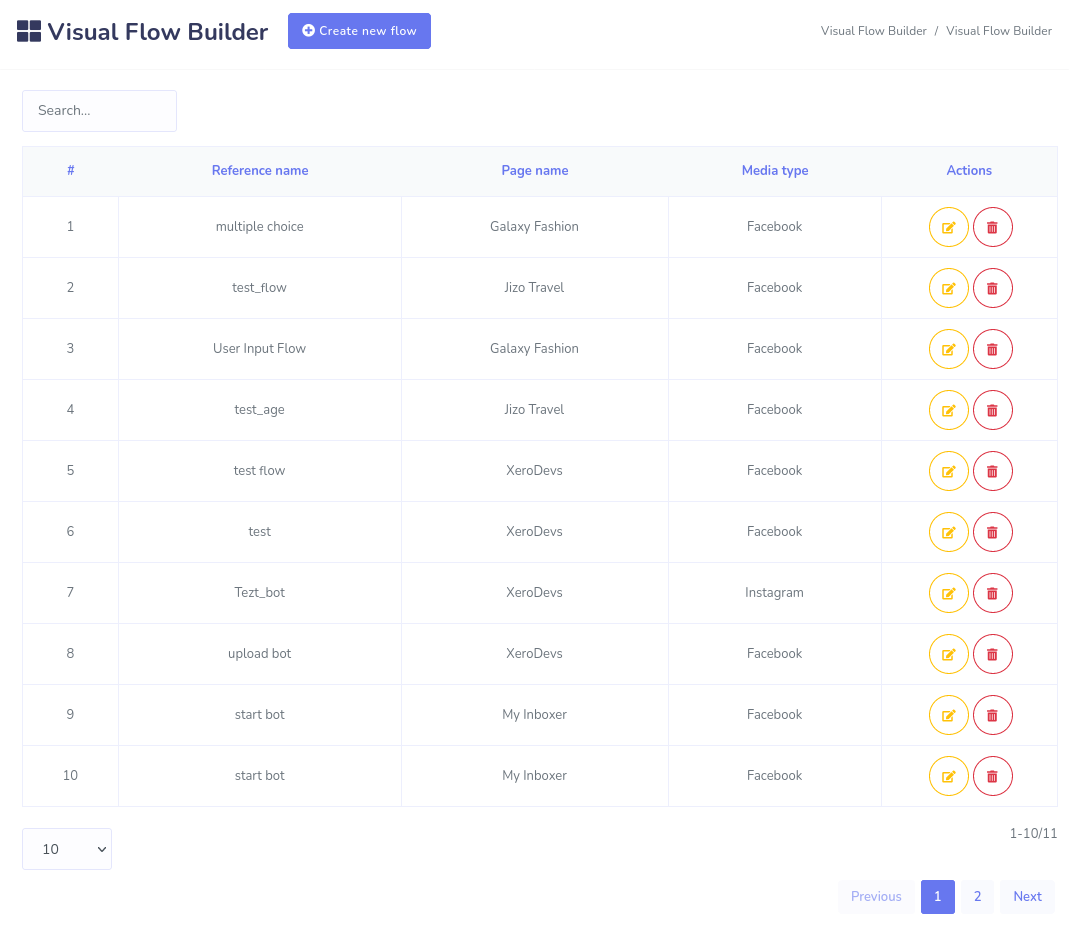
Now click on the Create new flow button and a popover modal form will appear.
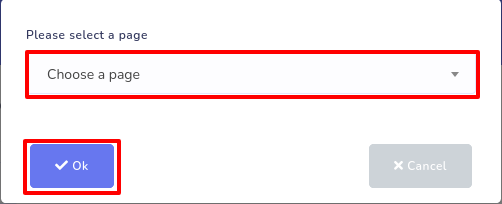
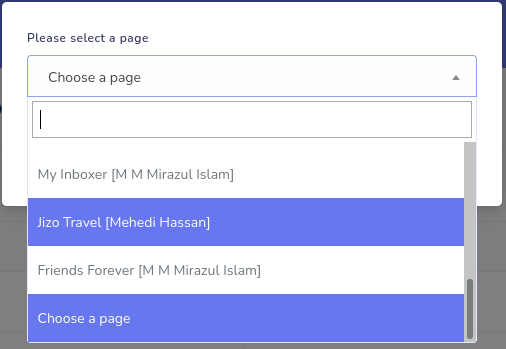
Then click on the Choose a page field and a drop-down menu of the Facebook pages and Instagram accounts will appear. From the drop-down menu, select a Facebook page or Instagram account you want to create a User Input Flow campaign with.
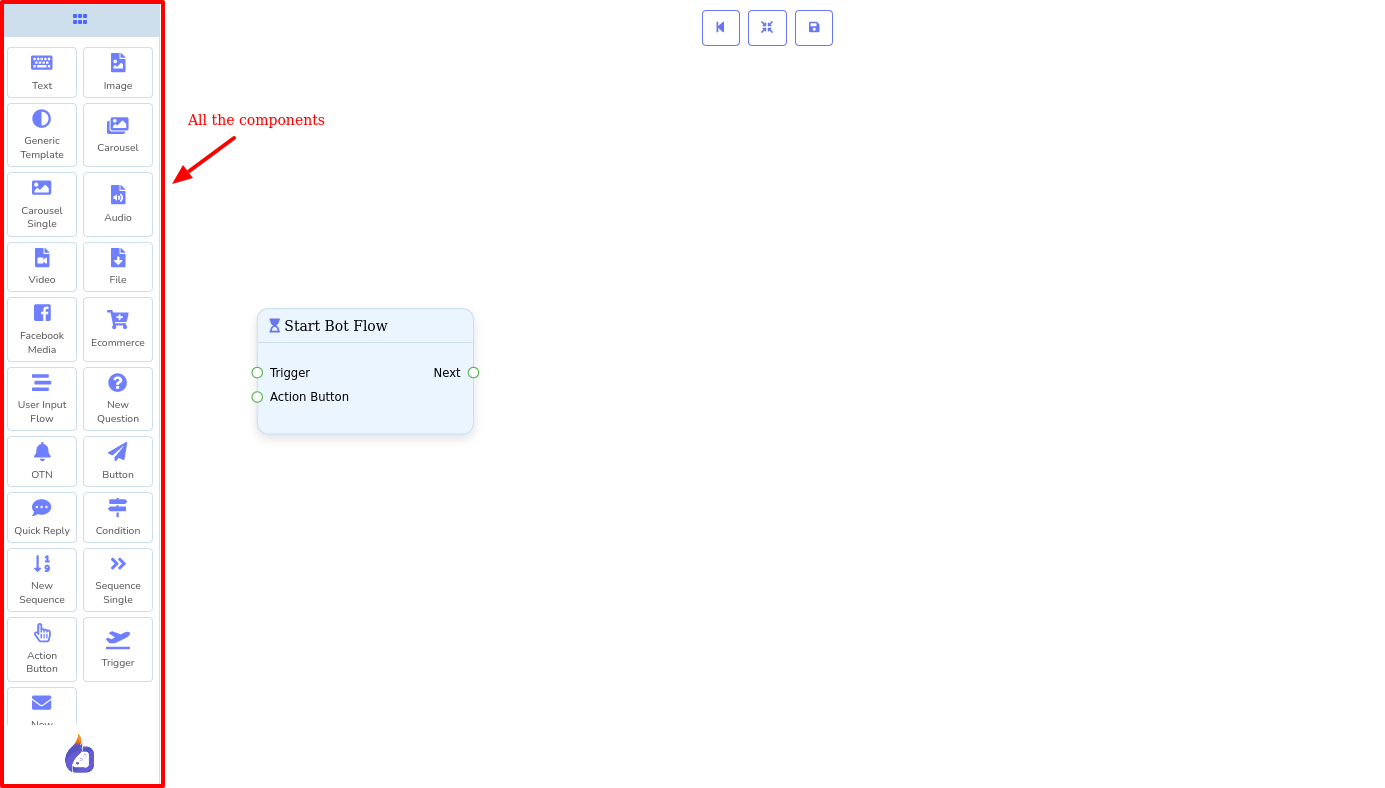
Now click on the okay button and the Flow Builder will editor will appear with all the components are gathered together at the left sidebar and the Start bot flow component on the editor.
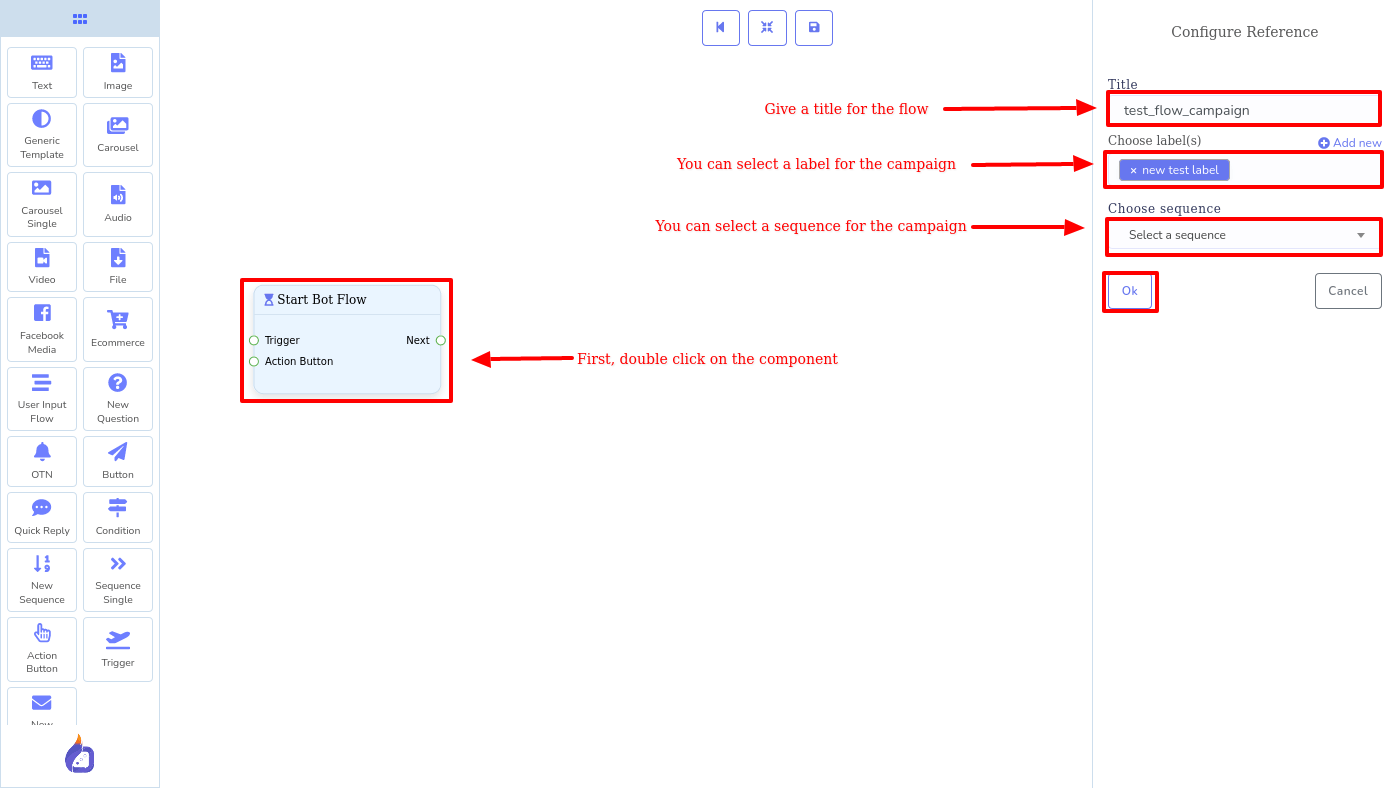
Double-click on the component, and instantly a right sidebar will appear with some fields. Now give a title for the campaign in the title fields— the field is required. You can also choose a label and sequence for the campaign. But these two fields are optional. Click on the okay button.
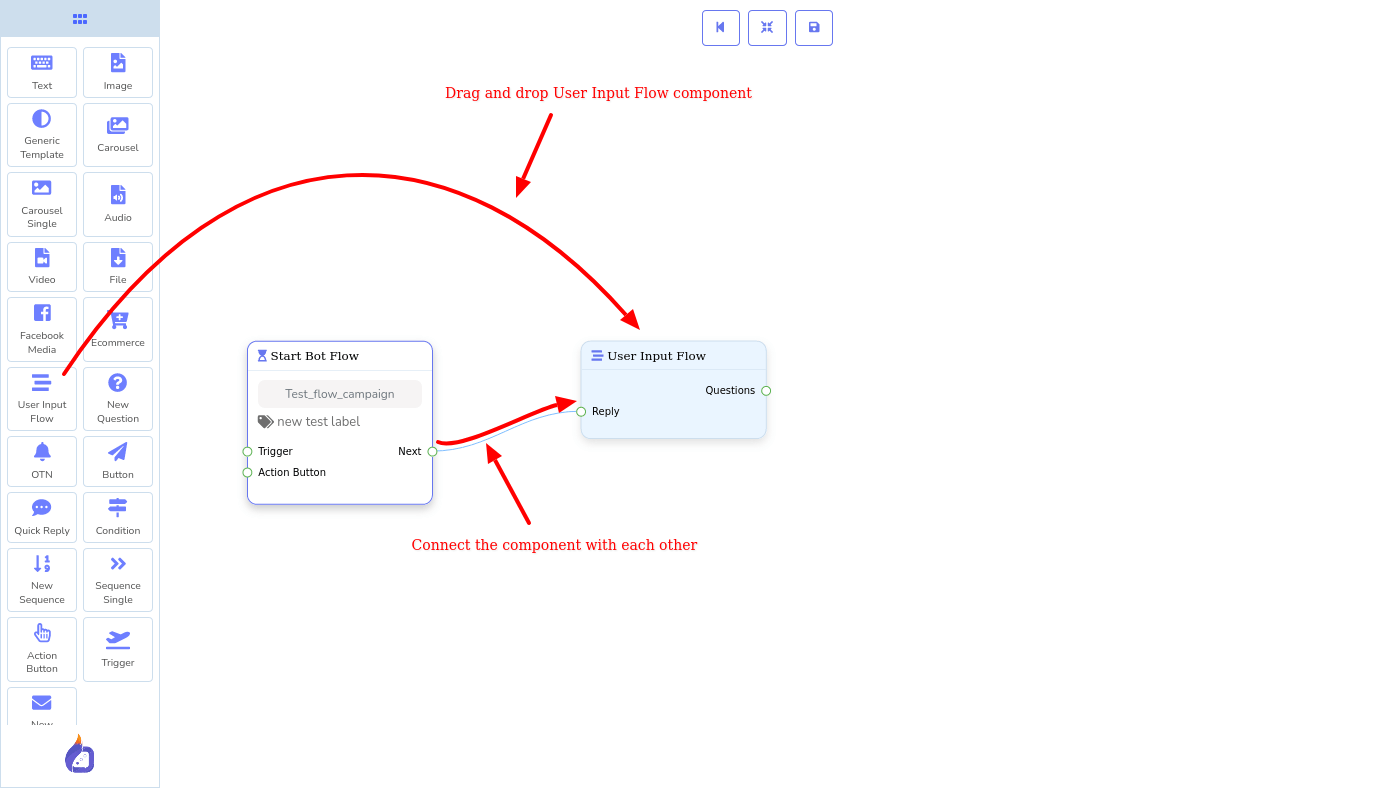
Now the component is filled with title, label, and sequence name.
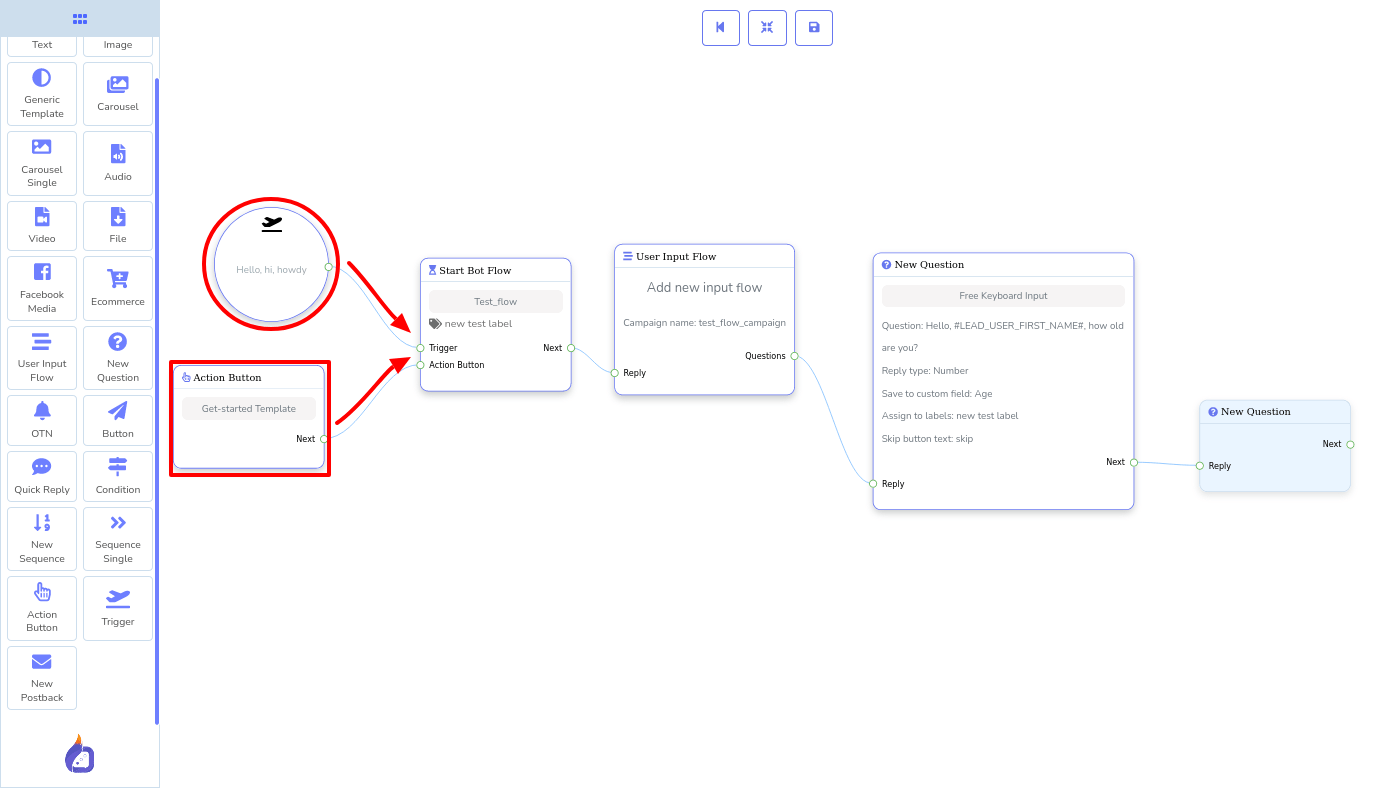
Now drag the User Input Flow component from the left sidebar and drop it on the editor. After that, you have to connect the User Input Flow component with the Start bot flow component.
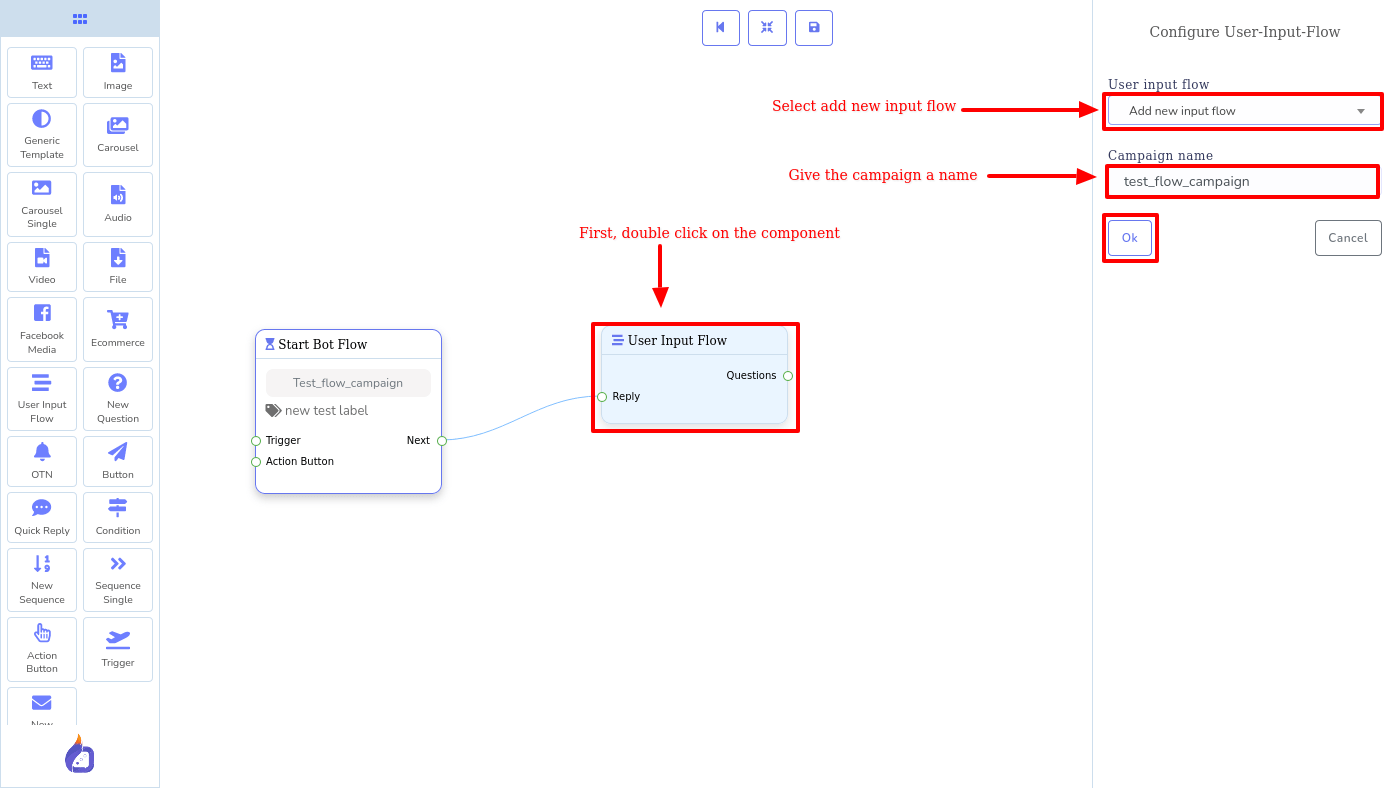
Then double-click on the User Input Flow component and instantly appear a left bar called Configure User-Input-Flow. On the left bar, you will see a field called select flow campaign. Now click on the select flow campaign and a drop-down menu of add new input flow and different already created campaigns under the select flow campaign option. If you want to use an already created campaign in your bot, select a campaign from under the select flow campaign options and the User Input Flow campaign will be added to the bot. On the other hand, if you want to create a new flow campaign, you have to click on add new input flow.
In this article, I'm going to show you how to create a new flow campaign. Therefore, select the add new input flow and instantly another field called campaign name will appear. Now write a name for the campaign in the field. And click on the ok button.
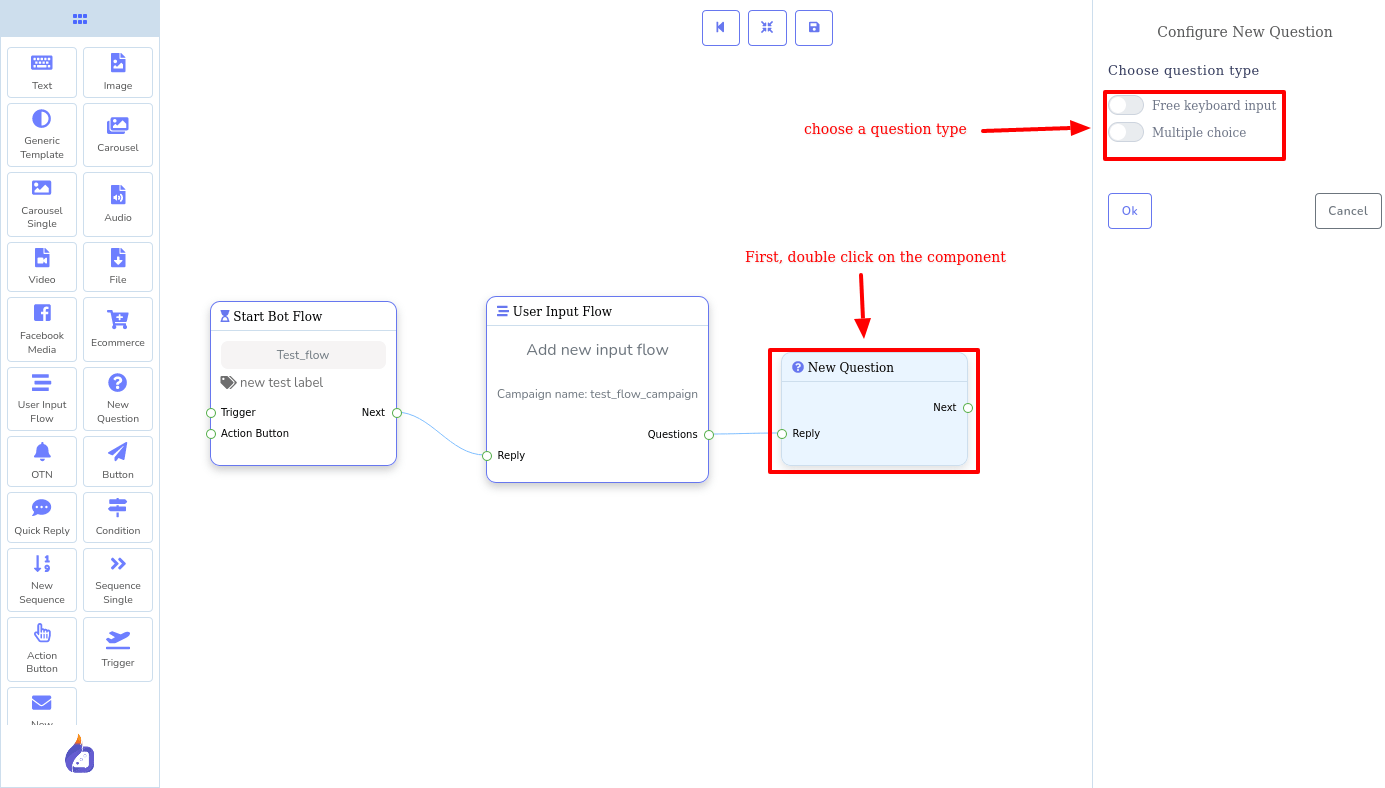
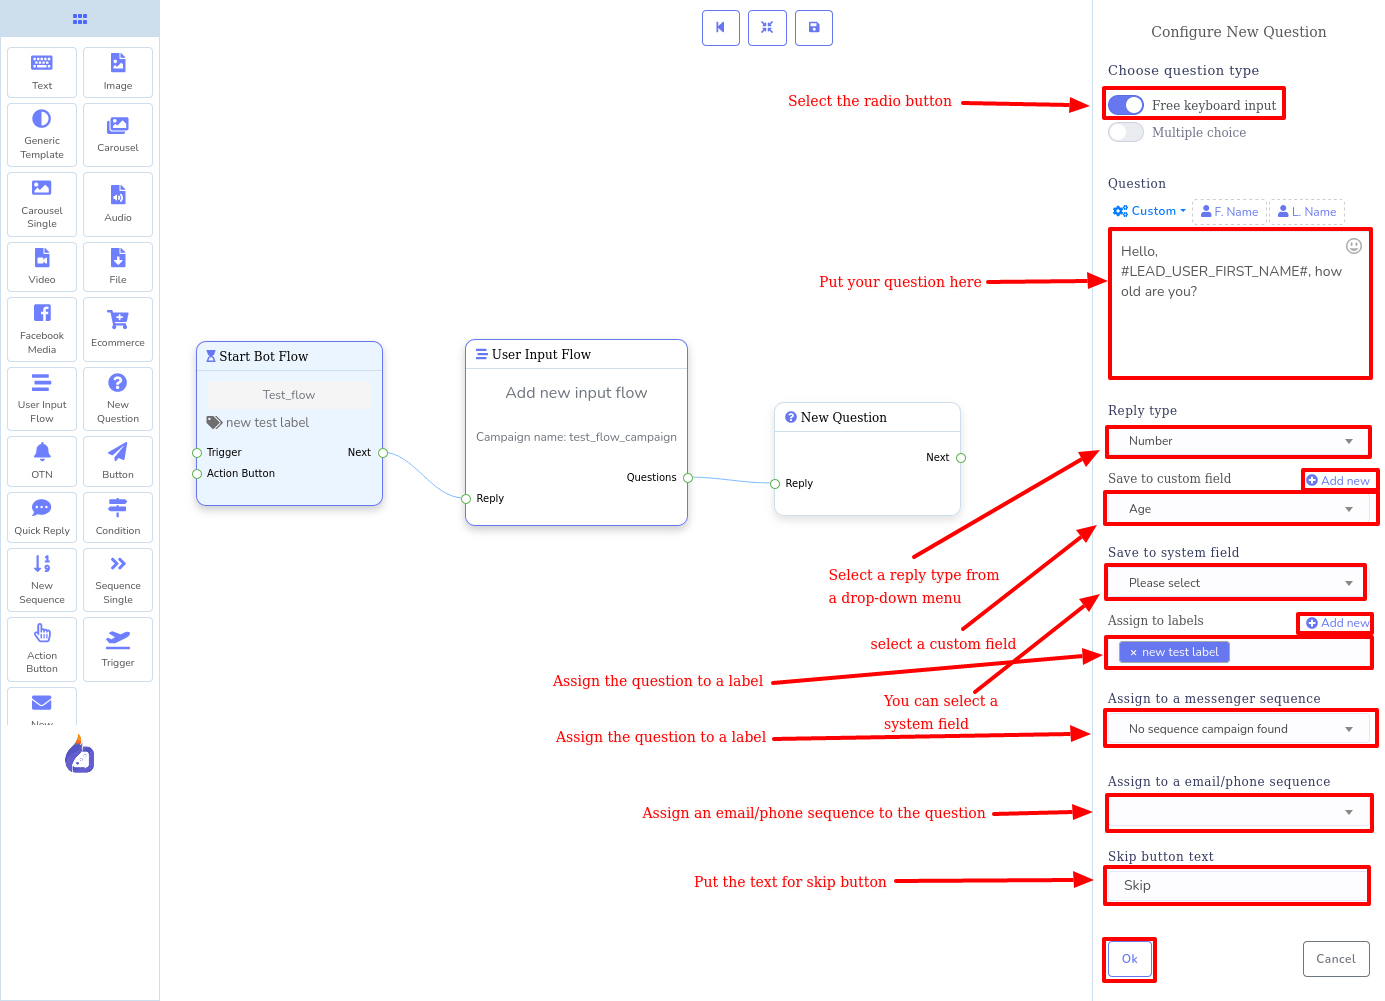
Instantly, a component called new Question will appear connected with the User Input Flow component. Now double-click on the Question component and the left bar called Configure New Question will appear. Now choose a question type from two options— Free Keyboard Input and Multiple Choice— by selecting the radio button next to them.
Free Keyboard input Question:
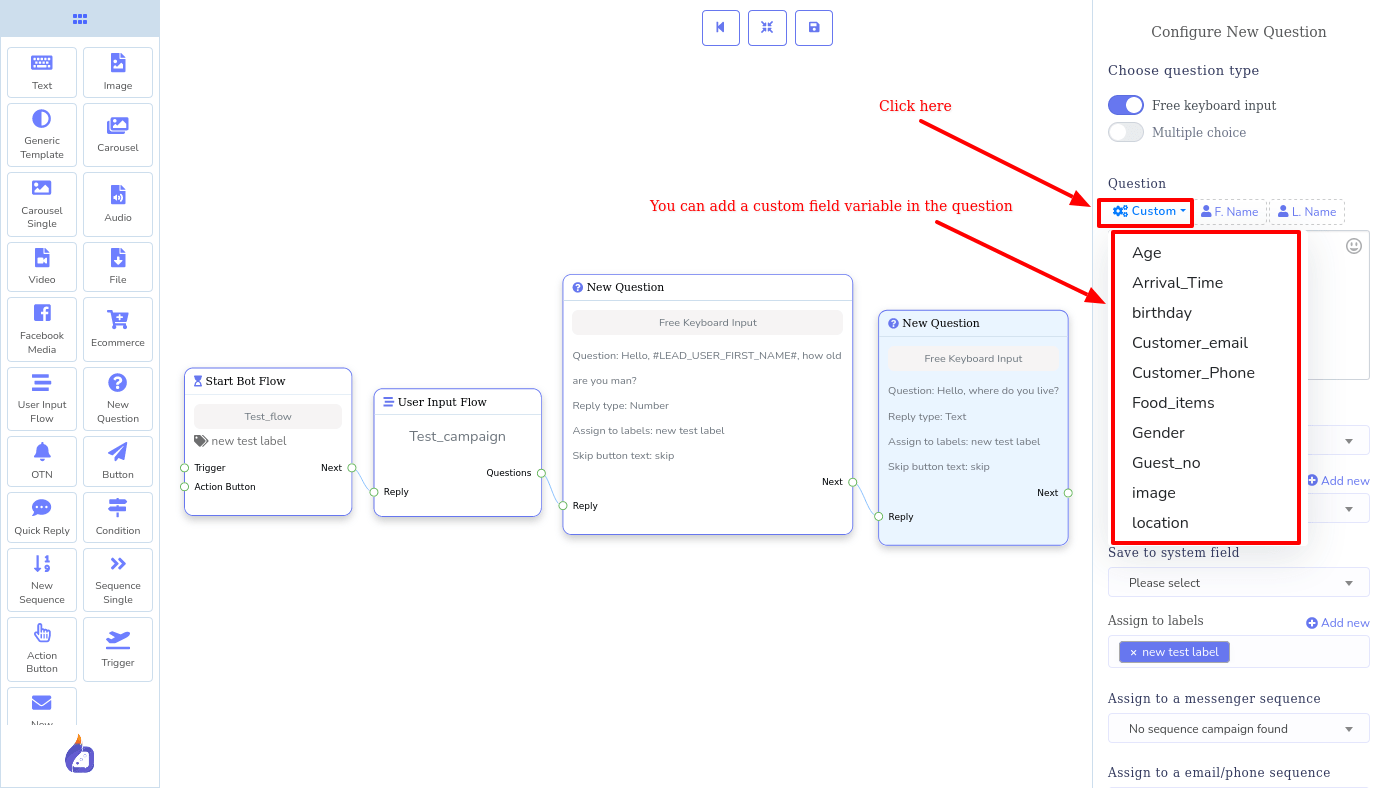
To configure a free keyboard input question type, select the radio button of the question type. Instantly, some fields will appear.
Now you have to fill-out the fields to configure a free keyboard input question.
Put your question in the Question field. you can add a custom field variable in the question. Click on the field called custom and instantly a drop-down menu of different custom field variable will appear. From the drop-down menu, select a variable and the variable will be added to the question
After you have put question on the question field, click on the Reply Type field. Instantly, a drop-down menu of different reply types-- Text, Email, Phone, Number, Url, File, Image, Video, Date, Time, Datetime-- will appear. From the drop-down menu, select the appropriate reply type. After that, click on the save to the custom field. Instantly, a drop-down menu of the different already created custom fields will appear. Now select a custom field and the answer to the question will be saved to the custom field you have selected.
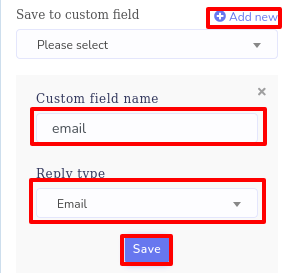
You can create an new custom field. Click on the Add-new field and instantly appear two more fields-- custom field name and reply type. Now put a name for the custom field and click on the reply type field. Instantly a drop-down menu of different reply type will appear. Now select a reply type from the drop-down menu. Then click on the save button and the new custom field will be added.
Also, you can select a system field and the answer to the question will be saved to the system field. Click on the save to system field and a drop-down menu of different system fields will appear. Now select a system field from the drop-down menu.
You can, of course, assign the question to a label. Click on the assign to the label fields and a drop-down menu of the different labels will appear and select a label. You can also create new label. To create a new label, you have to write down the name of the label and hit enter. Instantly, a new label will be created and selected.
Also, you can add the question to a messenger sequence. Click on the assign to the messenger sequence field and a drop-down menu of different messenger sequences will appear. Now you have to select a messenger sequence. And if there is no messenger sequence, you will see ‘no sequence message found’.
You can assign the question to an email and phone sequence. Just click on the field and a drop-down menu of different email and phone sequence will appear. Now select a sequence from the drop-down menu. If there is no email and phone sequence, you will see no result found.
You can also add a skip button under the question so that the user can skip the question by clicking on the skip button. In the skip button text field, put a text for the skip button.
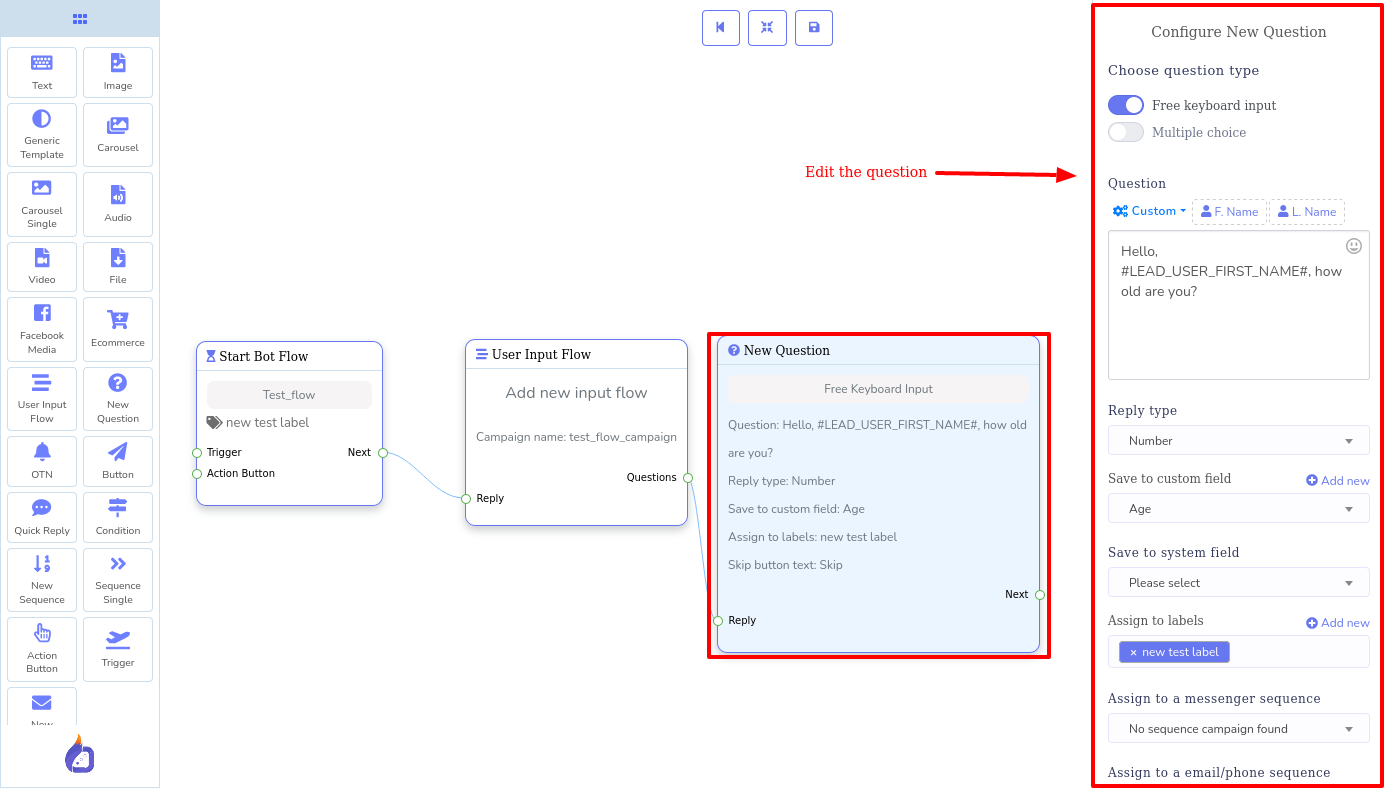
Now click on the okay button. And you will see the question component with detailed information about the question. After configuring a question, you can edit the question. Double-click on the Question Component and the right sidebar called question will reappear. Now you can edit the question and then click on the ok button to save the edits.
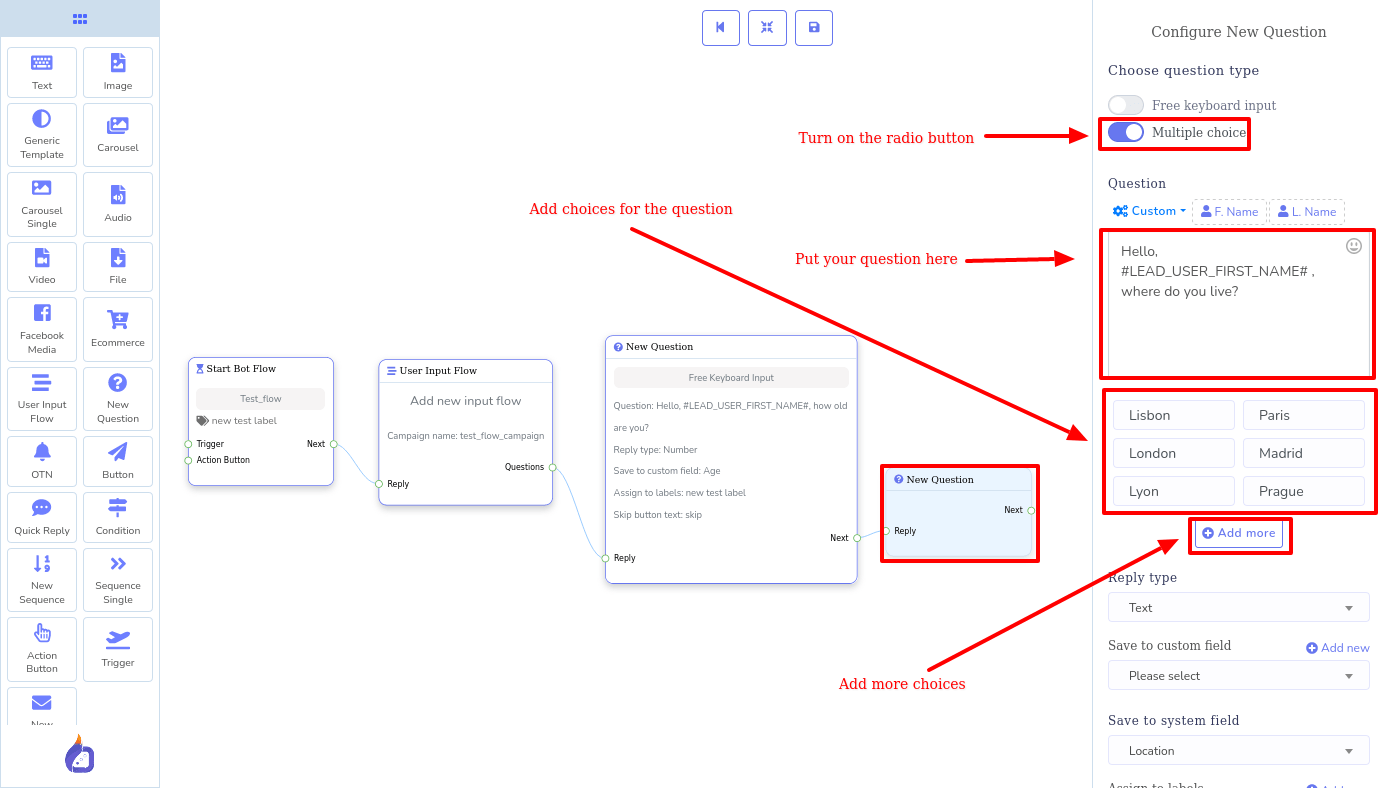
Multiple choice question:
To create a multiple-choice question, choose multiple-choice as a question type by selecting the radio button. Then put the question in the question field. Then you will see four fields to put the choices. Now put your choices in the four fields. By clicking on the add more button, you can add another field. You can add as many fields as you want. And the rest of the things are the same as configuring free keyboard question type.
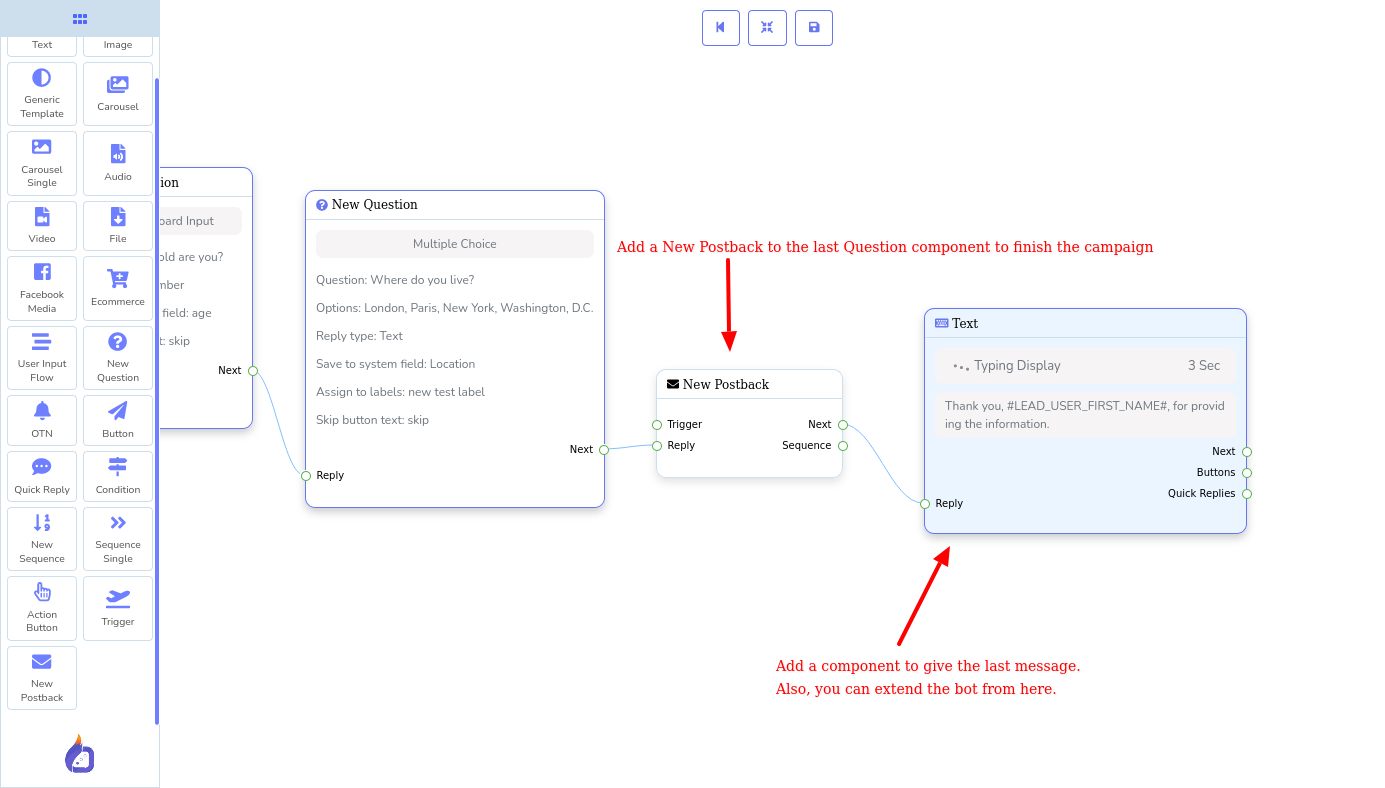
You can add as many questions as you need. Then you have to connect the questions component with each other via the next and reply sockets. After the questions, if you want to give the users the last message, you have to connect a new post-back component to the last question. And to the post-back component, you have to add another component. You can add text, image, or video components to give the user the last message. Also, you can extend the bot.
If you connect the campaign with the trigger component, the campaign will be attached to a bot. In this case, the User Input flow campaign will be part of the bot. You can also use the User Input Flow campaign in other bots by selecting the campaign.
If you follow the step by step instructions in this blog, you will be able to create User Input Flow Campaign on the Flow Builder very easily
You can also watch the video tutorial on how to create User Input Flow campaign on the Flow Builder


4 Comments Login to comment
-

When will this be available in flowbuilder?
-
ranzu84 Team
3 years agoWe have released the update. Get updated to the latest version of ChatPion and some of its add-ons.
-
-

where is the video tutorial?
its better to explain with videos-
ranzu84 Team
3 years agoYes, we do have video tutorials on YouTube: https://youtu.be/yAsRlqz08Ow
We have released the update. Thanks
-

4
4557
Social Media Management