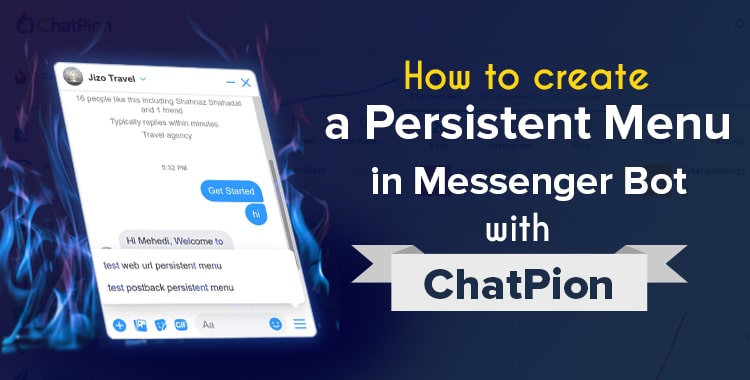
In this how-to-blog, I will show you how to create a persistent menu in a messenger bot with ChatPion.
To create a persistent menu, first, go to the dashboard of ChatPion. Then click on the bot manager option at the left-sidebar of the dashboard.
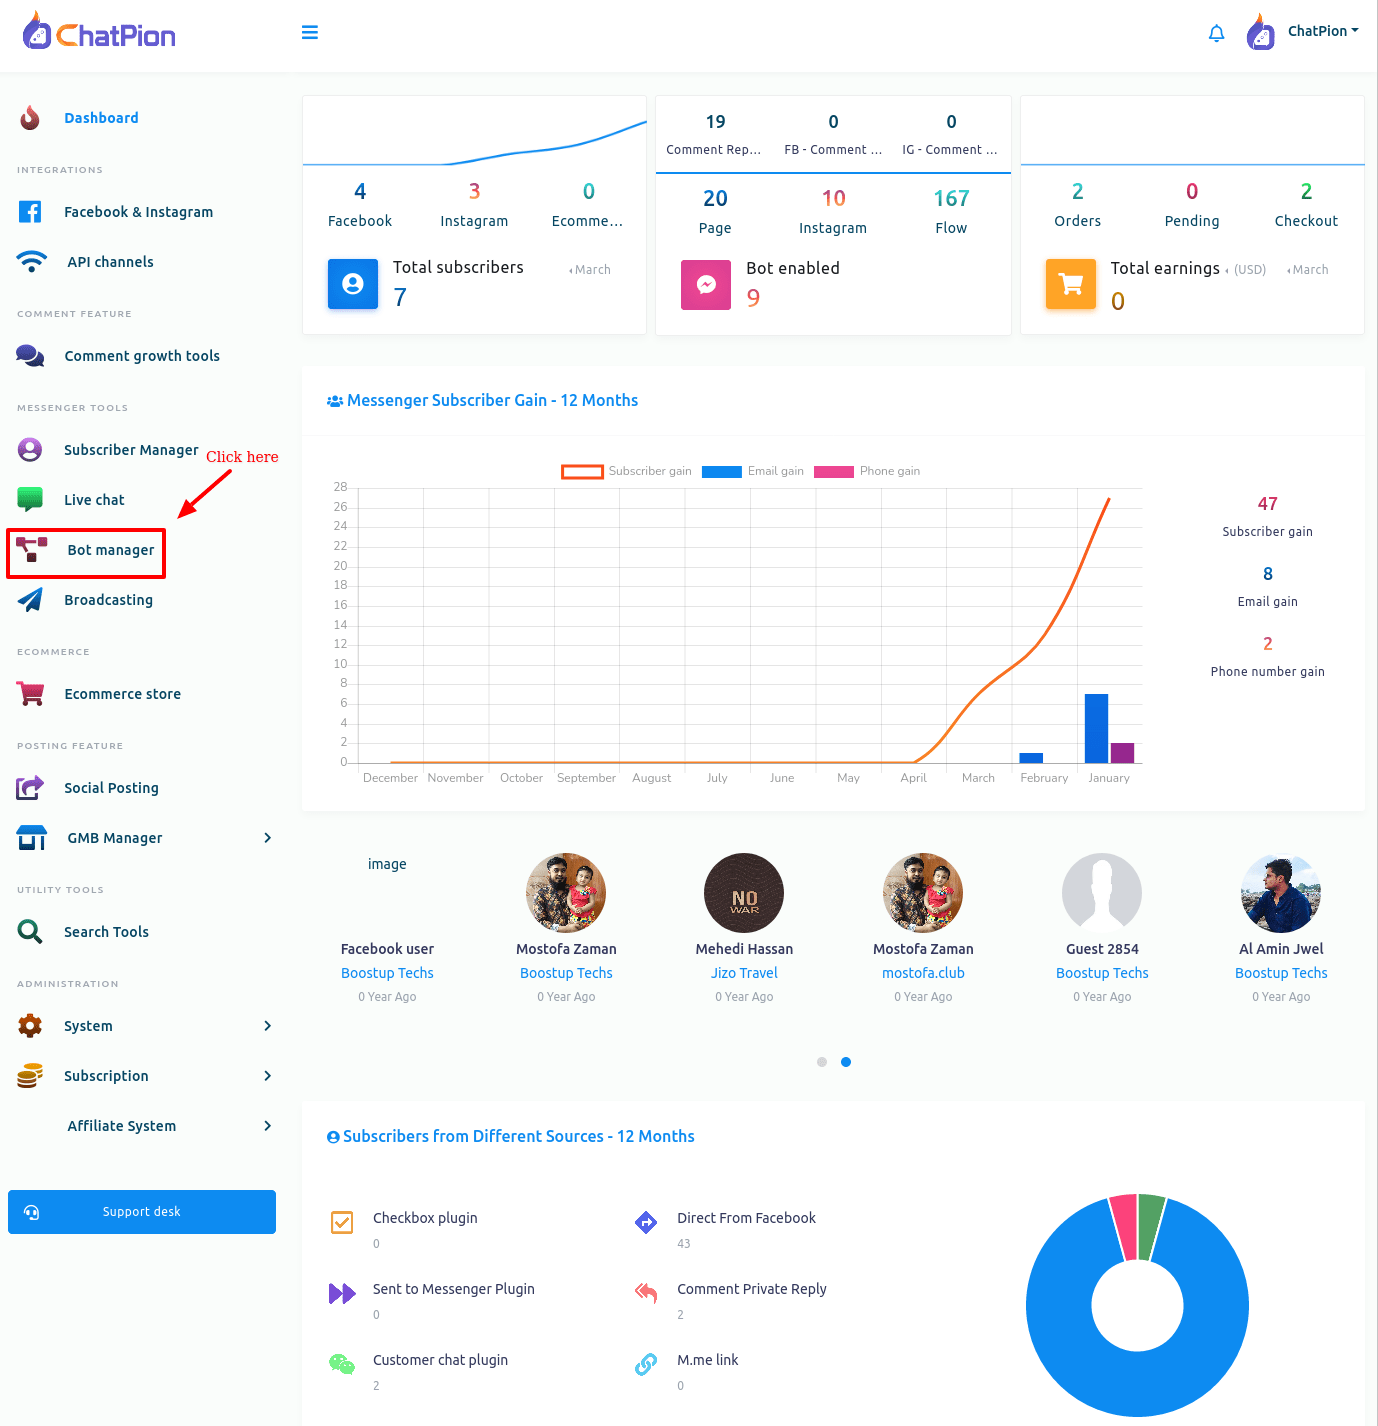
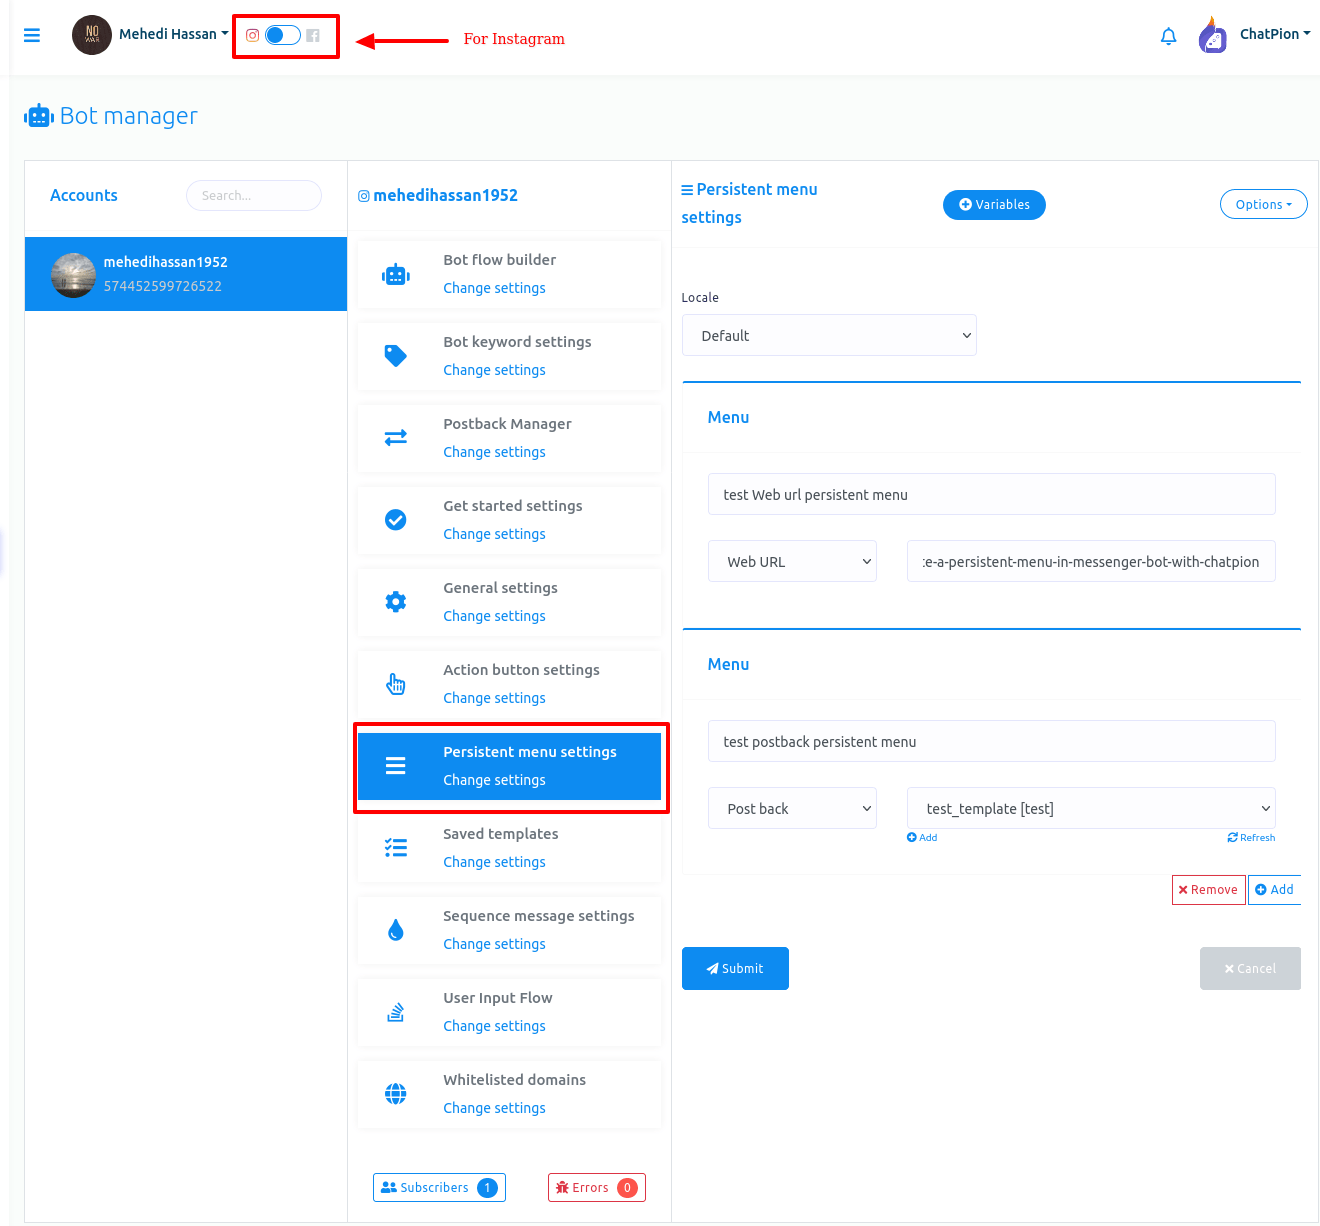
Instantly, the bot manager page will appear. Then click on the persistent menu setting option at the middle bar.
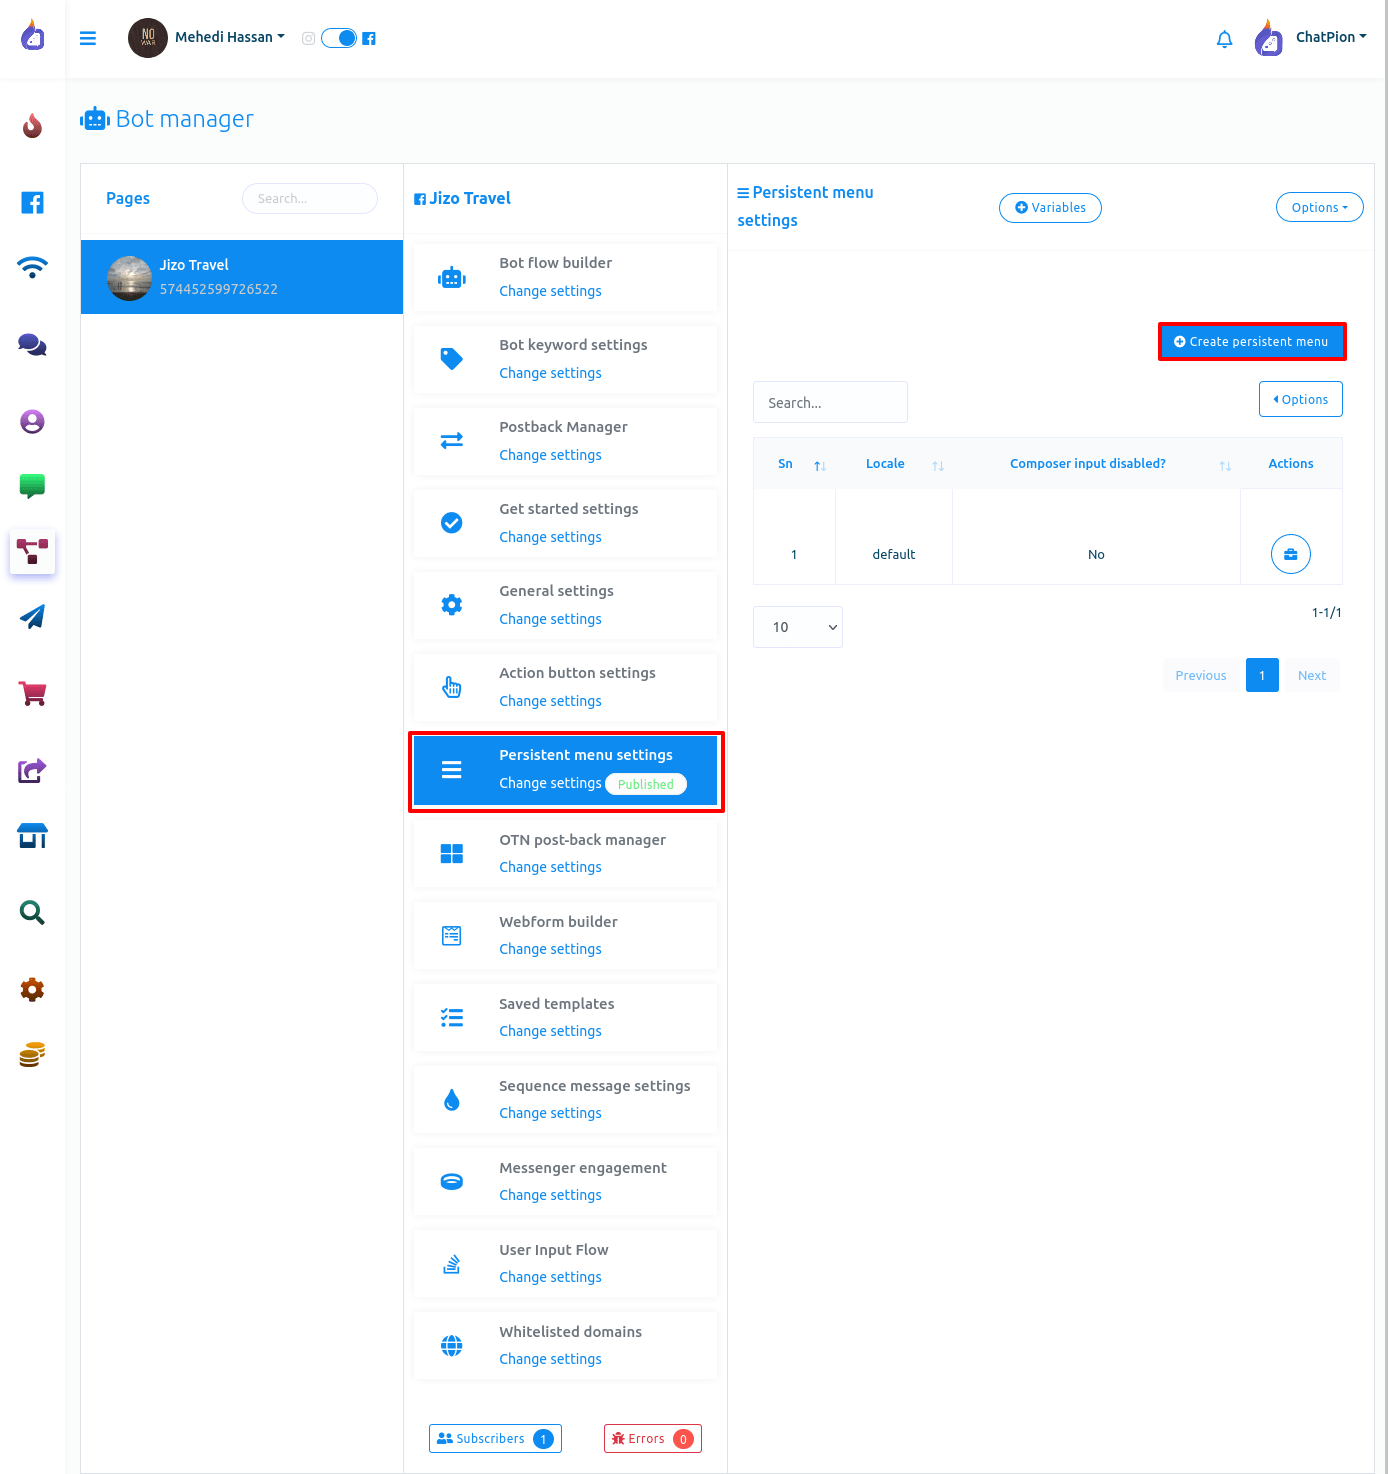
Instantly, a persistent menu setting will appear on the right side of the same page.
Now click on the create persistent menu button.
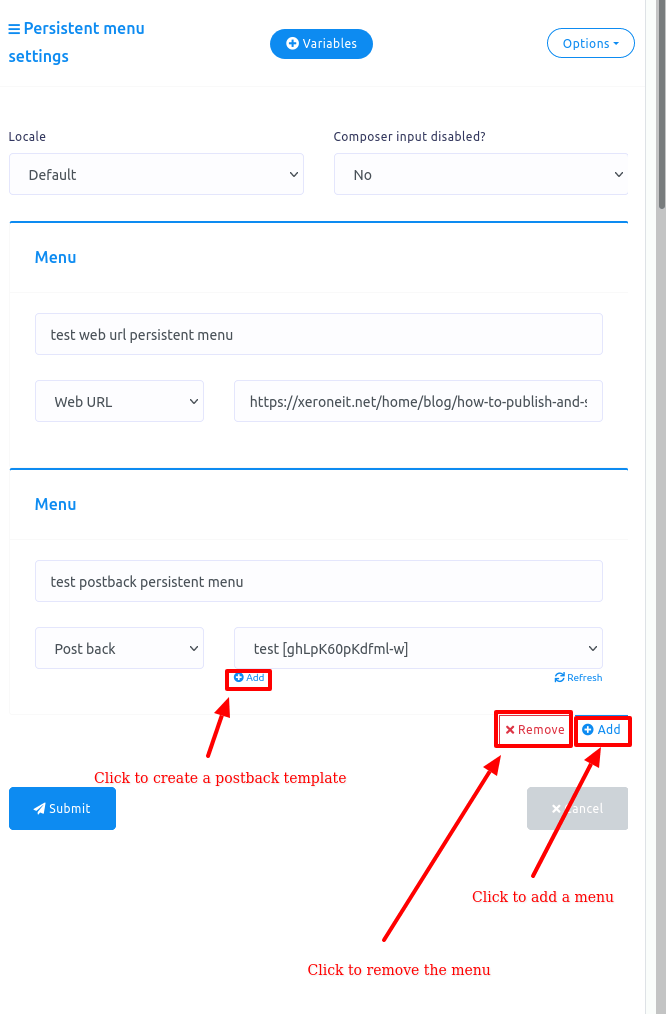
Instantly, a form will appear with some fields. Now you have to fill out the fields to create a persistent menu.
In the field called local, select a language from the drop-down menu. In the “Composer input disabled?” field, you can disable or enable it by selecting no or yes from a drop-down menu. If you disable the composer input by selecting yes, the user can not type a message — they have to. On the other hand, if you enable the Composer input by selecting no, the user can type a message in the messaging window.
After that, give a menu title in the Menu title field.
In the last field, you can provide a Web URL or a postback template. If you want to provide a web URL, select Web Url from the drop-down menu and provide a web URL.
On the other hand, if you want to provide a postback, select postback from the drop-down menu and select a predefined postback template from a drop-down menu.
And if you don’t have a predefined postback template, you can create a postback template by clicking on the add button under the field. When you select postback, the add button will appear under the field. Well, showing how to create a postback template is out of the scope of the blog. And I think that you may already know how to create a postback template.
Of course, you can add more menus by clicking on the add button.
Now click on the submit button. Instantly a success message will appear. That is, the persistent menu has been created.
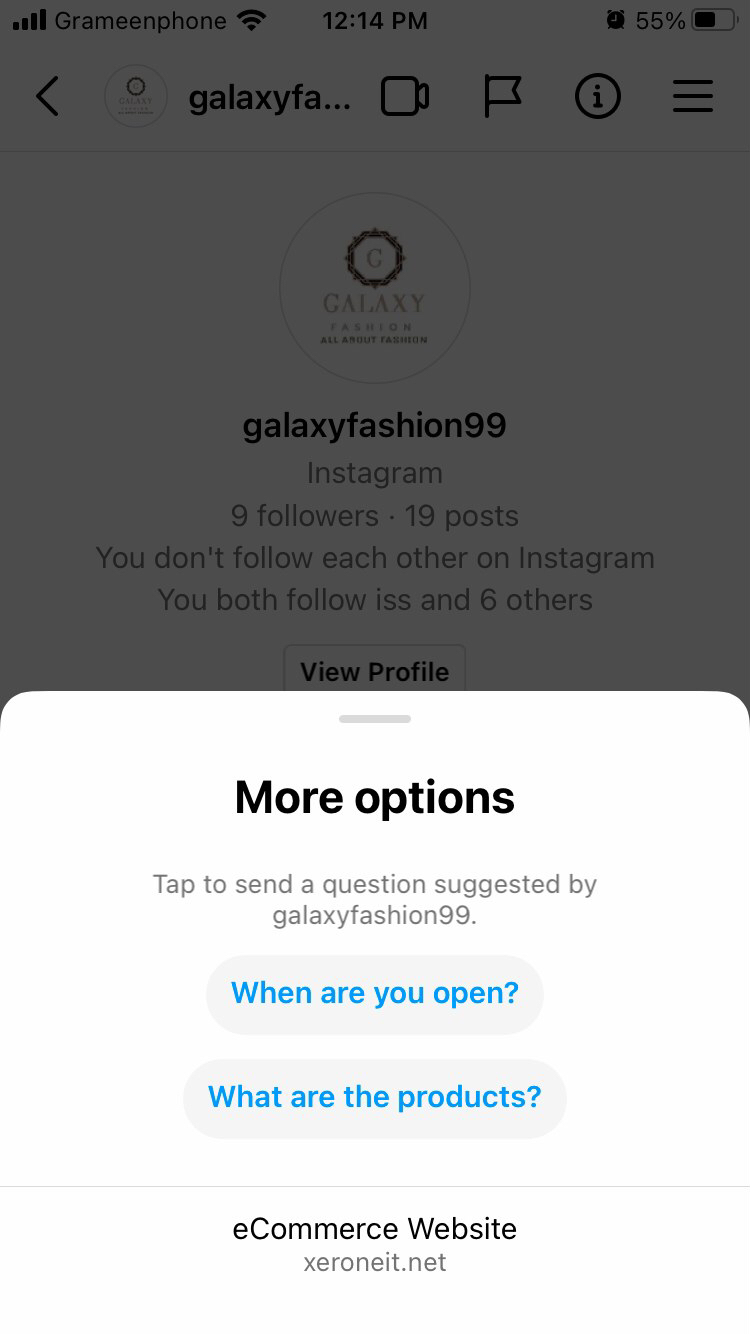
As for creating a persistent menu for Instagram, there is no Composer input disabled? field.
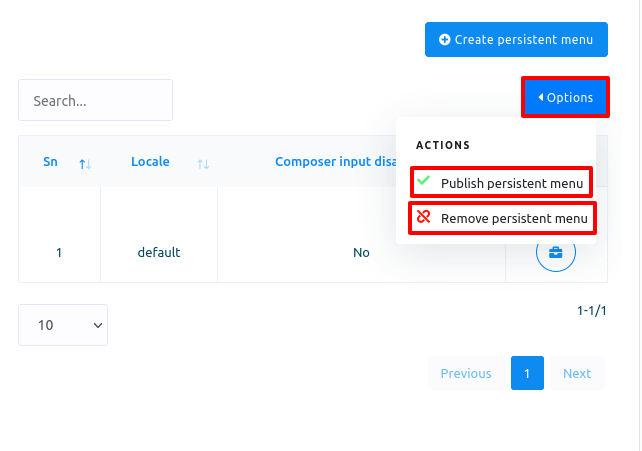
Then you have to publish the persistent menu. To publish the persistent menu, click on the option button and a drop-down menu of publish persistent menu and remove persistent menu will appear. Now click on the publish persistent menu to publish the persistent menu.
Also, you can remove the persistent menu by clicking on the remove persistent menu option.
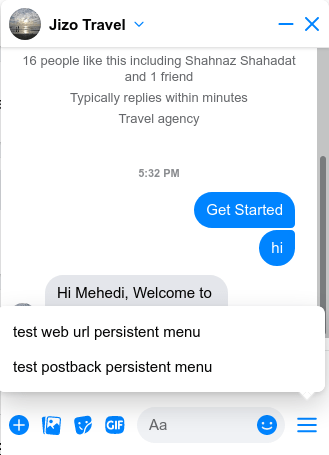
After publishing the persistent menu, you will see the persistent menu on the messenger of your page.
Persistent menu of Facebook looks like this:
And persistent menu on Instagram looks like this:
Thank you for reading the blog and watching the video tutorial. Enjoy persistent menu in the messaging window of your page.


2 Comments Login to comment
-

Hello, Composer input disabled is not working
-

Hello postback is not working for me
2
6043
Social Media Management